


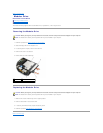


3. Lower the palm rest onto the computer ensuring that the cable to the I/O board is not pinched and the RJ-11 connector is properly seated.
4. Angle and connect the right side of the palm rest, then lower and snap the left side into place.
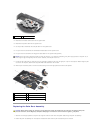
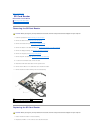
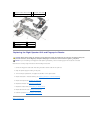
5. Turn the computer assembly upside down with the front edge toward you, and tighten the three captive screws:
l One near the front of the right-side edge of the laptop
l One in the middle of the left side edge of the laptop
l One near the upper left corner, marked with an "S"
6. Turn the computer topside up.
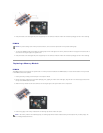
7. Place the thermal plate into position, then replace the four M2.5 x 5-mm screws to secure it.
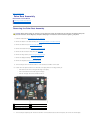
8. Connect the contactless smartcard cable, the touchpad cable, the speaker cable, the wireless switch cable, and the fingerprint reader cable (optional) to
the system board.
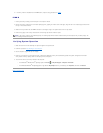
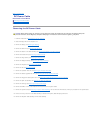
9. Turn the computer over and replace the ten M2.5 x 5.5-mm screws and the one M2.5 x 8-mm screw on the bottom of the computer to secure the palm
rest.
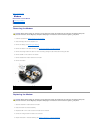
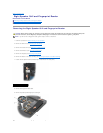
10. Replace the discrete graphics heat sink (see Replacing the Discrete Graphics Heat Sink).
11. Replace the processor heat sink (see Replacing the Processor Heat Sink).
12. Replace the fan (see Replacing the Fan).
13. Replace the optical drive (see Replacing the Modular Drive).
14. Turn the computer topside up and replace the keyboard (see Replacing the Keyboard).
15. Replace the display assembly (see Display Assembly).
16. Replace the hinge covers (see Replacing the Hinge Covers).
17. Replace the bottom of the base assembly (see Replacing the Bottom of the Base Assembly).
18. Replace the optical drive (see Replacing the Modular Drive).
19. Replace the hard drive (see Replacing the Hard Drive).
20. Follow the procedure After Working on Your Computer.
Back to Contents Page