33
10. Check the WAN connection status. Click the Status tab and then the Connection Status button. Look
under WAN to view the State of Connection 1, it should read Connected. If the WAN connection state
does not appear to Connected after a few minutes, go back to the Connection 1 Setup menu, check the
settings and make sure they are correct.
Configure Connection 1 for CLIP
CLIP or IPoA connections function in a similar way to DHCP or Static IP connections. Certain CLIP
connections function like P2P networks. The router must obtain IP settings from a server owned by an ISP, or
use a static IP address assigned by the ISP.
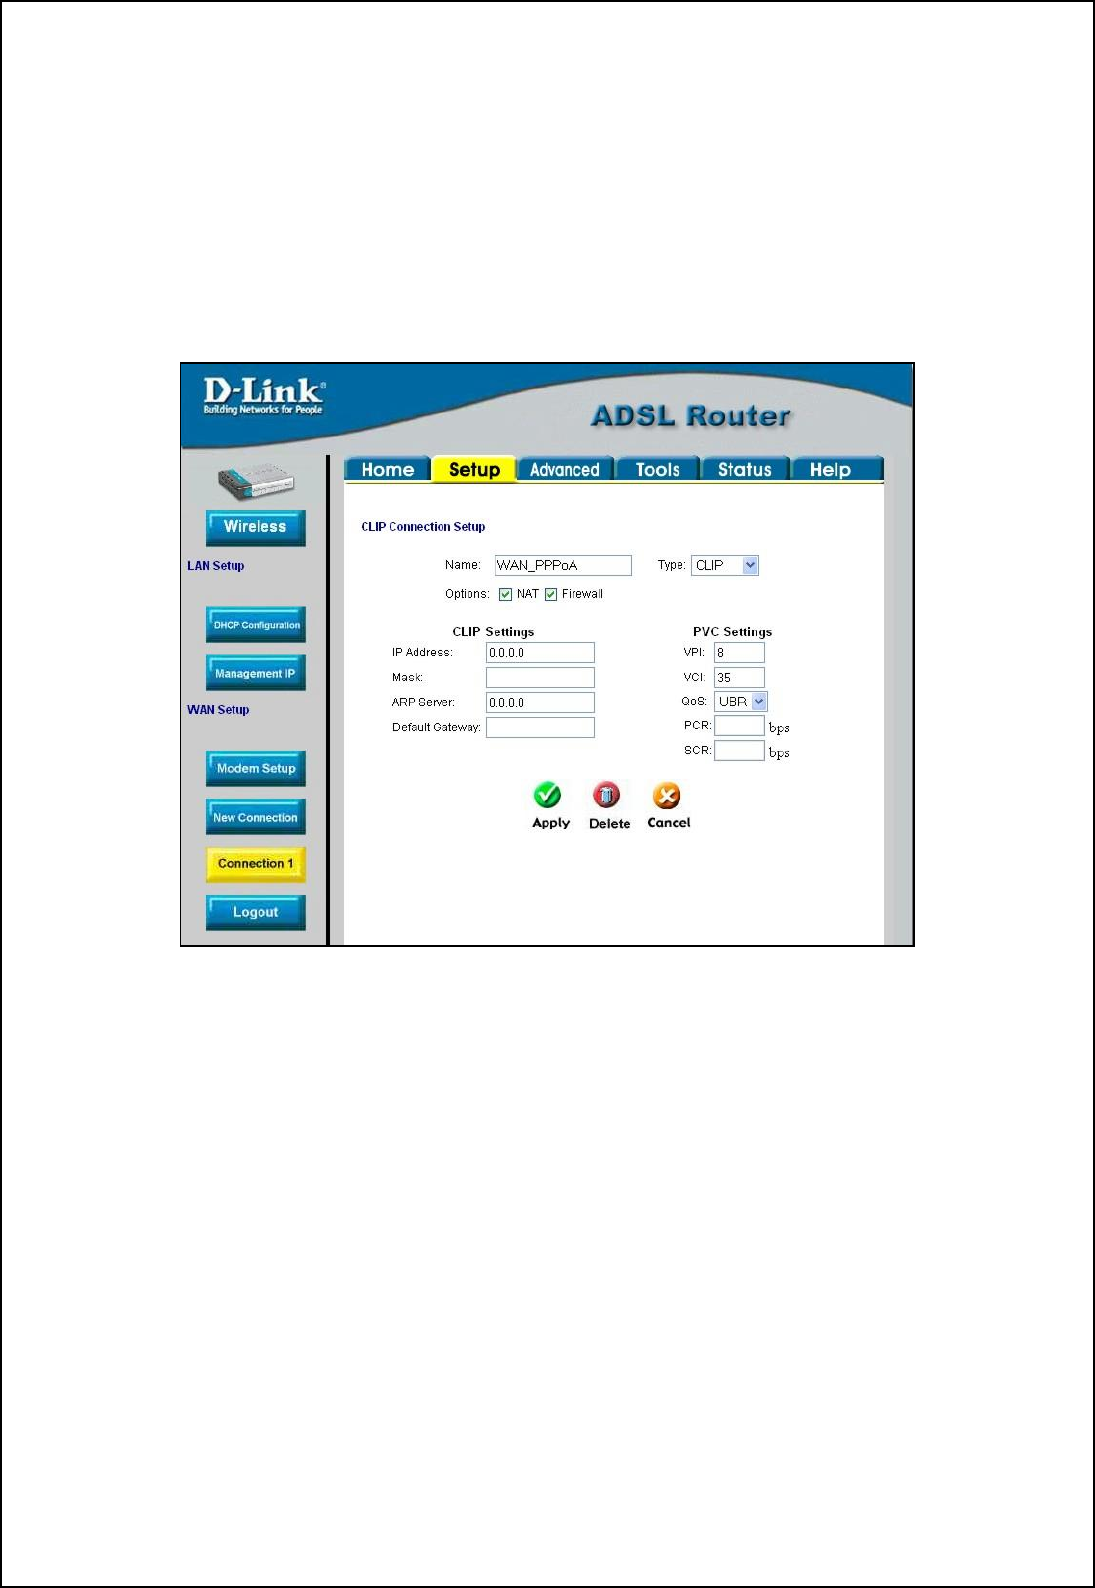
Figure 3-14. Setup – Configure Connection 1 for CLIP (IPoA)
To configure the WAN connection for CLIP, perform the steps listed below. Some of the settings do not need to
be changed when you first set up the device but can be changed later if you choose.
1. Click the Connection 1 button under WAN Setup to view the default PPPoA Connection Setup
configuration menu.
2. Select CLIP from the Type: pull-down menu. This action will change the menu so it offers different
settings for configuration.
3. Type in a Name: in the space provided (WAN_PPPoA is used in the above example).
4. Under Options, enable NAT and/or Firewall by selecting the appropriate checkbox. This option is not
available for a Bridge connection.
5. Based upon the information your ISP provided, enter the IP Address (e.g. 168.128.1.1), the Subnet
Mask (e.g. 255.255.255.0), ARP Server (e.g. 168.128.1.2) and the Default Gateway (e.g. 168.128.1.1).
6. If you are told to change the VPI or VCI values, type in the values given to you by your service
provider. Many users will be able to use the default settings.
7. Leave the default QoS values if you are unsure or the ISP did not provide this information.
8. Do not change the PCR or SCR values unless you are required to do so. If you are told to change these,
type in the values given to you by your service provider.


