34
9. Click the Apply button when you have entered all the information. The web browser will briefly go
blank. You are now finished changing setting for the primary WAN connection known as Connection 1.
It is now necessary to save the changes you just made and restart the Router.
10. To save the changes made to Connection 1, click the Tools tab and then click on the System
Commands button. Click on the Save All button to store the configuration settings. Click on Back
button to return to the System Commands menu.
11. Check the WAN connection status. Click the Status tab and then the Connection Status button. Look
under WAN to view the State of Connection 1, it should read “N/A”. If the WAN connection state does
not appear to Connected after a few minutes, go back to the Connection 1 Setup menu, check the
settings and make sure they are correct.
Create a New Connection
An alternative method of changing the connection type used by the Router is to create a new connection.
Creating a new connection will not change the Connection 1 settings, it will make a new set of coneciton
configuration settings. The new set created will be labeled Connection 2, additional connections created will be
likewise labeled Connection 3, Connection 4 and so on. Use the method described here to create up to 8 different
connection configuration sets. At any time you may reconfigure the settings for any previously created
connection by clicking on the menu button for the connection displayed under the WAN Setup heading.
New Connection Example 1 - Create a New PPPoE Connection
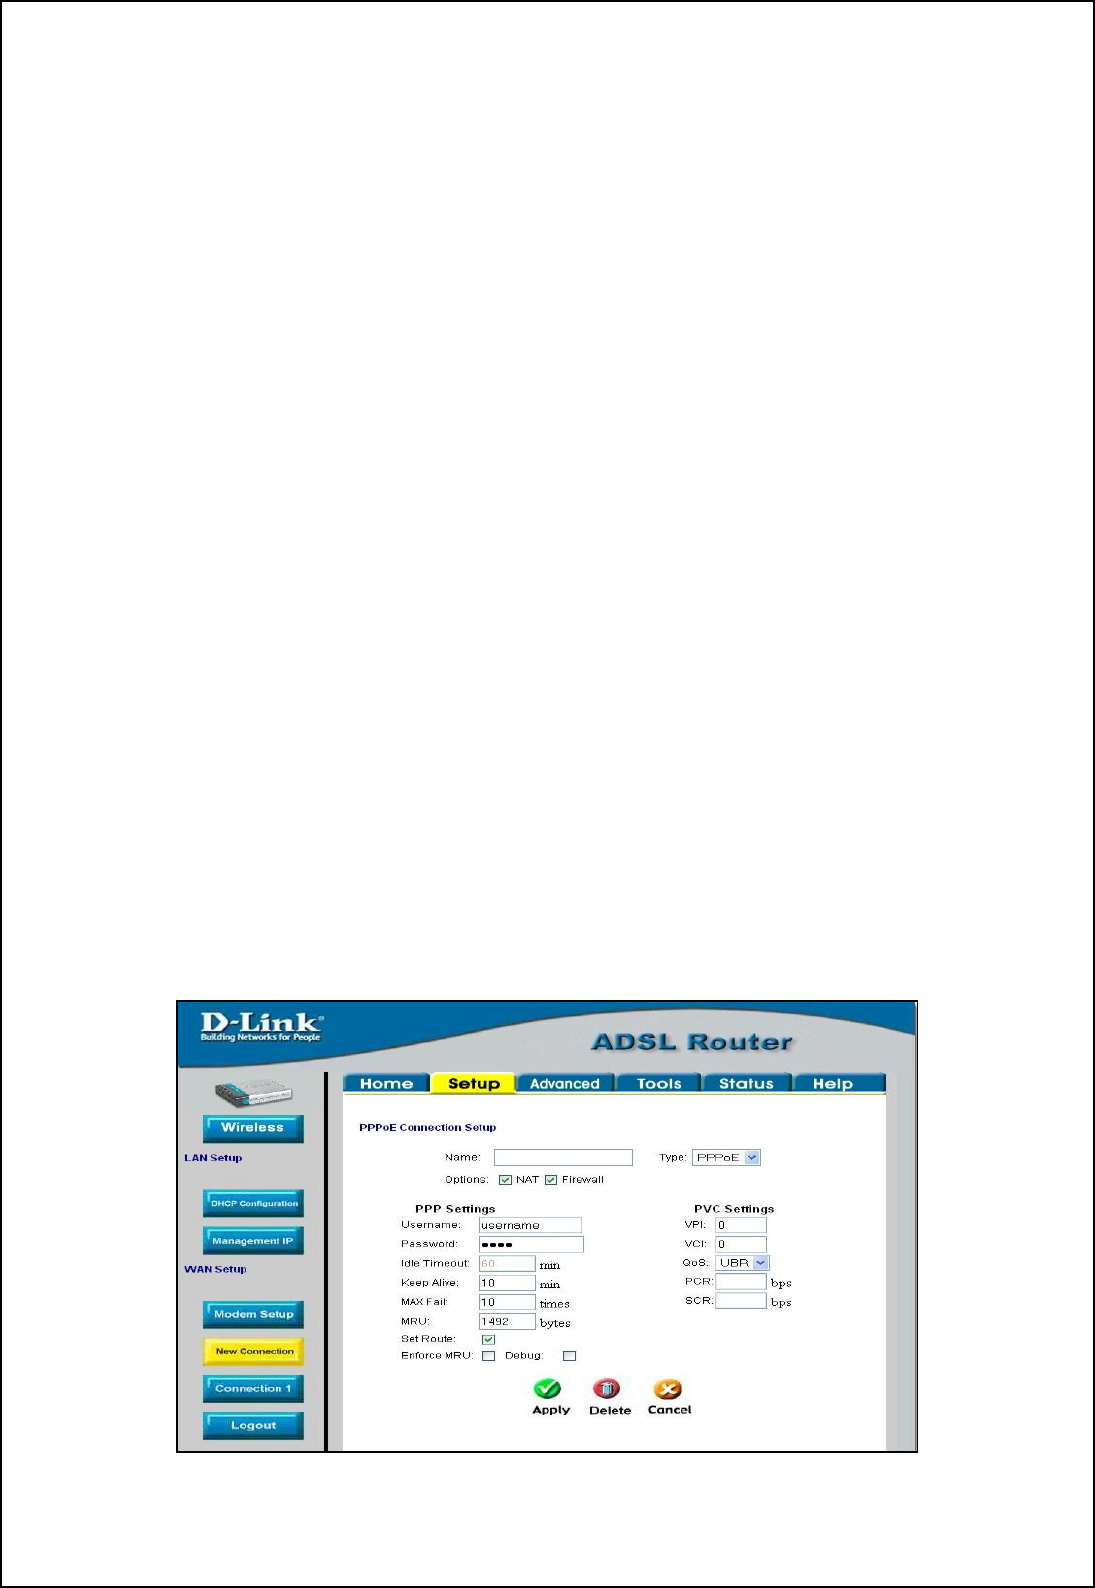
The example below describes how to set up a new connection that uses a PPPoE type WAN conneciton. To
create a new connection:
1. Click on the New Connection button.
2. Configure the Router for the Type: of conneciton used and all the remaining settings as discussed in the
preceding section. In this example, the type of connection used for Connection 2 is PPPoE. Notice also
that the VPI and VCI values have been changed.
3. Click the Apply button to cerate the new connection. Notice that a new menu button is created
(Connection 2), this links to the configuration menu for Connection 2 (see example below). If at any
time you want to change, delete, disconnect or connect this WAN connection, click on the Connection 2
button.
4. Save the new connection.
Figure 3- 15. Set up a New Connection – Connection 2


