2-23
• If the controller cannot be mounted to a metal chassis, use a ground wire
with a lug attached to connect one of the controller's plated-through
mounting holes to chassis ground.
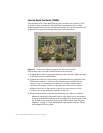
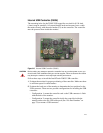
4 Connect the power cable harness (See “Elo Part Numbers” on page 79 for
part number) to the 2x5 male connector (See “Elo Part Numbers” on page 79
for part number) at P4 on the controller. Connect the other end to a power
source. If a suitable +5 Vdc power source cannot be found inside the display,
use an AC-to-DC power supply. The 2500S controller power requirements
are +5 Vdc nominal. Refer to Appendix B for current requirements.
If you have grounded the controller to the metal chassis as recommended in
Step 3 on page 22, the chassis ground connection through the power
connector, P4 pin 8, does not need to be connected. Likewise, do not connect
the Reset and LED Remote lines unless you have provided the appropriate
circuits.
The microprocessor pin that drives the status LED is connected to pin 5 of
the P4 power supply connector. This signal from the microprocessor may
also be used to drive an external indicator such as another LED.
To operate an external LED, connect the LED cathode to ground and the
anode to pin 5 of the P4 connector. Nominal current through the LED will be
6 mA, so a low-operating current LED should be used. An external resistor is
not required.
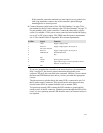
P4 Pins Signal Function
1 +Pwr Supply voltage positive
2 PwrCom Supply voltage negative (tied to pin 4)
3 N/C Not connected
4 PwrCom Supply voltage negative (tied to pin 2)
5 LED Remote External LED driver
6Key
7N/C
8 Chassis Frame ground connection
9 -Reset Open collector input: = normal operation; short to
PwrCom = hardware reset.
10 N/C


