


Installation of the RTM-ATCA-7150
ATCA-7150 and RTM-ATCA-7150 Getting Started (6806800G42B)
61
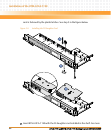
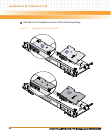
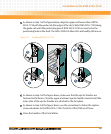
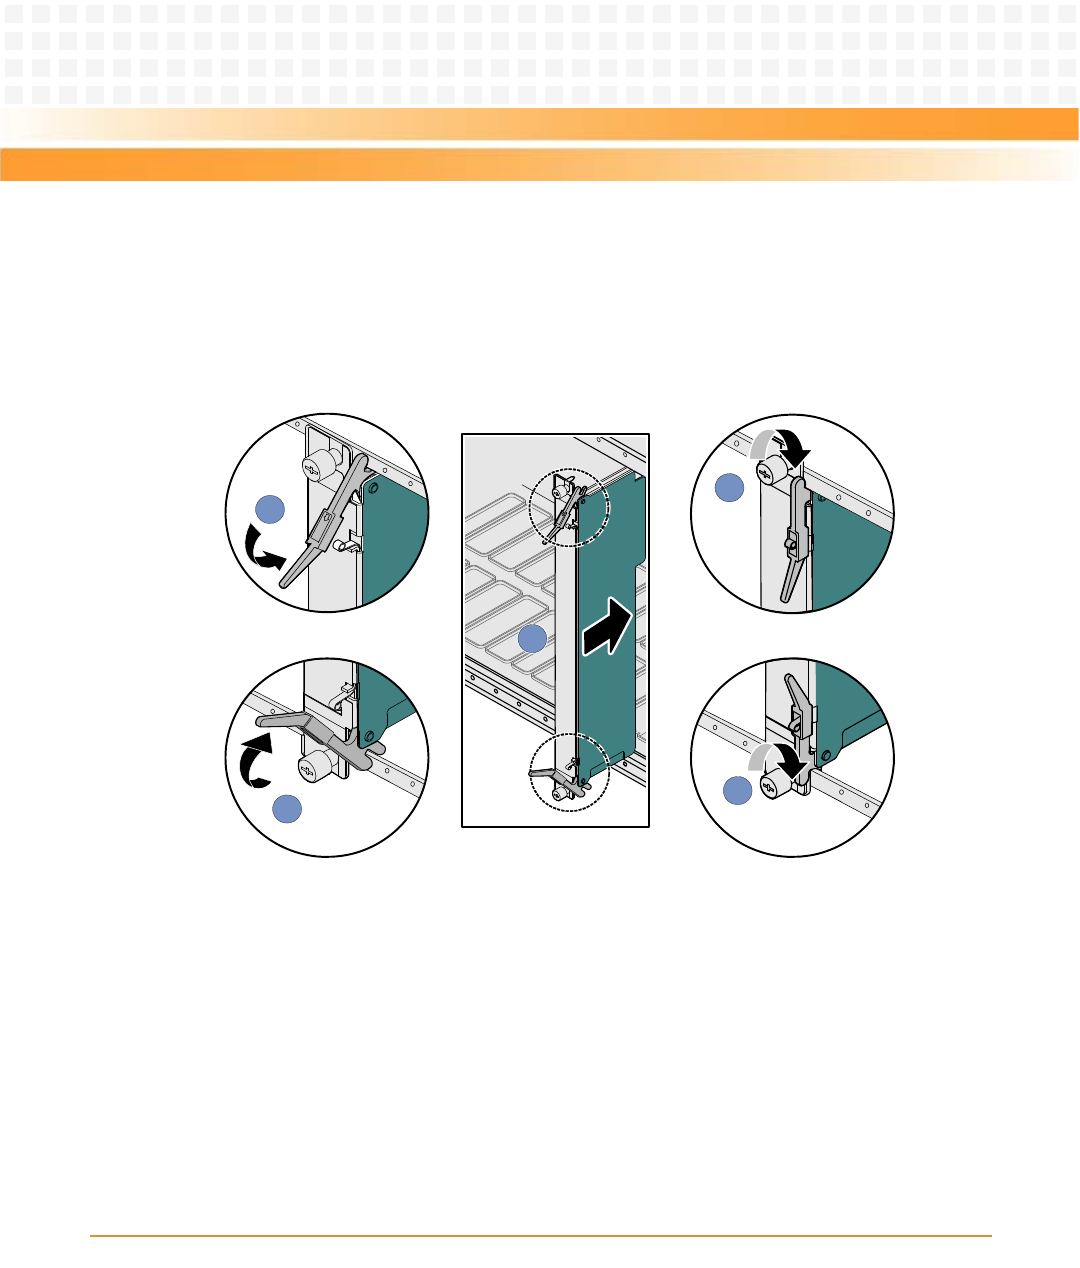
5. As shown in step 1 of the figure below, align the upper and lower sides of RTM-
ATCA-7150 with the guide rails (the edges of the slot). Slide RTM-ATCA-7150 along
the guide rails until the positioning pins of RTM-ATCA-7150 are inserted in the
positioning holes in the shelf. The LEDs; OOS LED, Blue LED, and healthy LED are on.
6. As shown in step 2 of the figure above, make sure that the ejector handles are
fastened to the beam. Close the upper and lower ejector handles inwards until the
inner sides of the ejector handles are attached to the face plate.
7. As shown in step 3 of the figure above, use the screwdriver to fasten the captive
screws clockwise to fix RTM-ATCA-7150. The LEDs of the RTM are off now.
8. Close the handles of the front blades
Figure 2-8 Installing RTM-ATCA-7150
3
2
2
3
1