


Hardware Installation of ATCA-7150
ATCA-7150 and RTM-ATCA-7150 Getting Started (6806800G42B)
97
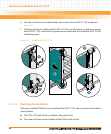
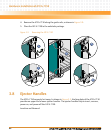
Table 3-7 describes the insertion and removal of the ATCA-7150 by using the ejector handles.
Power-On and Power-Off
Table 3-8 describes the power-on and power-off of the ATCA-7150 by using the ejector handles.
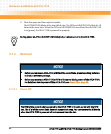
Table 3-7 Insertion and Removal of the ATCA-7150
Operation Description
Insert the ATCA-7150 The process for inserting the ATCA-7150 is as follows:
z When the ejector handles are not closed, the HOTSWAP LED is on
and the ATCA-7150 is not powered on.
z After the ejector handles are closed, the HOTSWAP LED blinks at the
long blink rate and the ATCA-7150 requests for activation.
z After activation, the ATCA-7150 is powered on and the HOTSWAP
LED is off.
Remove the ATCA-7150 The process for removing the ATCA-7150 is as follows:
z When you open the ejector handles, the HOTSWAP LED blinks at the
short blink rate and the ATCA-7150 requests for deactivation.
z After deactivation, the ATCA-7150 is ready for power-off.
z When the HOTSWAP LED is on, the ATCA-7150 is powered off. At
this time, you can remove the ATCA-7150 by holding the ejector
handles.
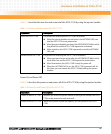
Table 3-8 Power-On and Power-Off of the ATCA-7150
Operation Description
Power on theATCA-7150 Whether you close one ejector handle or both ejector handles, the ATCA-
7150 can be powered on and work well.
Power off the ATCA-7150 When both ejector handles are opened, you can power off the ATCA-
7150.