


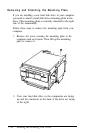
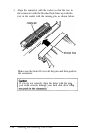
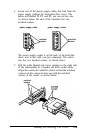
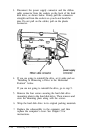
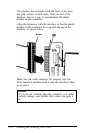

3.
Disconnect the power supply connector and the ribbon
cable connector from the sockets on the back of the hard
disk drive, as shown below. Firmly pull the connectors
straight out from the sockets so you do not bend the
pins. Do not pull on the cables; pull on the plastic
connector.
4.
If you are going to reinstall the drive, set it aside and see
“Installing or Removing a Drive in the Horizontal
Position” below.
If you are not going to reinstall the drive, go to step 5.
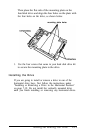
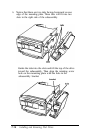
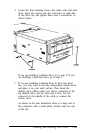
5.
Remove the four screws securing the hard disk drive
mounting plate to the hard disk drive. Then remove and
store the mounting plate along with the screws.
6.
Wrap the hard disk drive in its original packing materials.
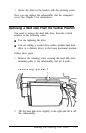
7.
Replace the subassembly in the computer, and then
replace the computer’s cover. See Chapter 5 for
instructions.
7-18
Installing and Removing Disk Drives