


Extron • System 4
xi
Switcher Series • User’s Manual
Chapter 2 • Configuration and Installation
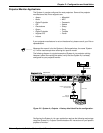
1. The System 4xi must be configured internally for the projector/monitor to be
used. This is done at the factory when the unit is ordered, and a label is placed on
the rear panel to identify the configuration. However, there may be times when the
configuration must be changed for a different application.
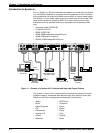
2. Place, or mount, each piece of equipment in the location where it will be used.
3. Connect the cables and adapter between the System 4xi and the projector.
4. Connect other equipment, such as audio or various controlling devices.
5. Set up the projector, using the manual(s) provided by the manufacturer.
_______ There are procedures in this chapter for installation of specific projectors to the
System 4
xi
. Use the appropriate procedure for your application.
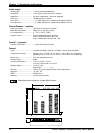
Communications Adapters and Cables
Because there are projector differences, Extron makes communication adapters
for the projector types listed on the previous page.
Each System 4xi package includes the following:
•
1 System 4
xi
(factory-configured for the customer)
•
1 Comm Adapter (specified by the customer)
•
1 CC 50' Projector Communications Extension cable
•
5 Audio connectors with captive screws (audio cables not included)
•
1 AC Power Cord
•
1 Tweaker (combination screwdriver)
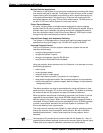
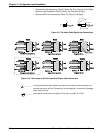
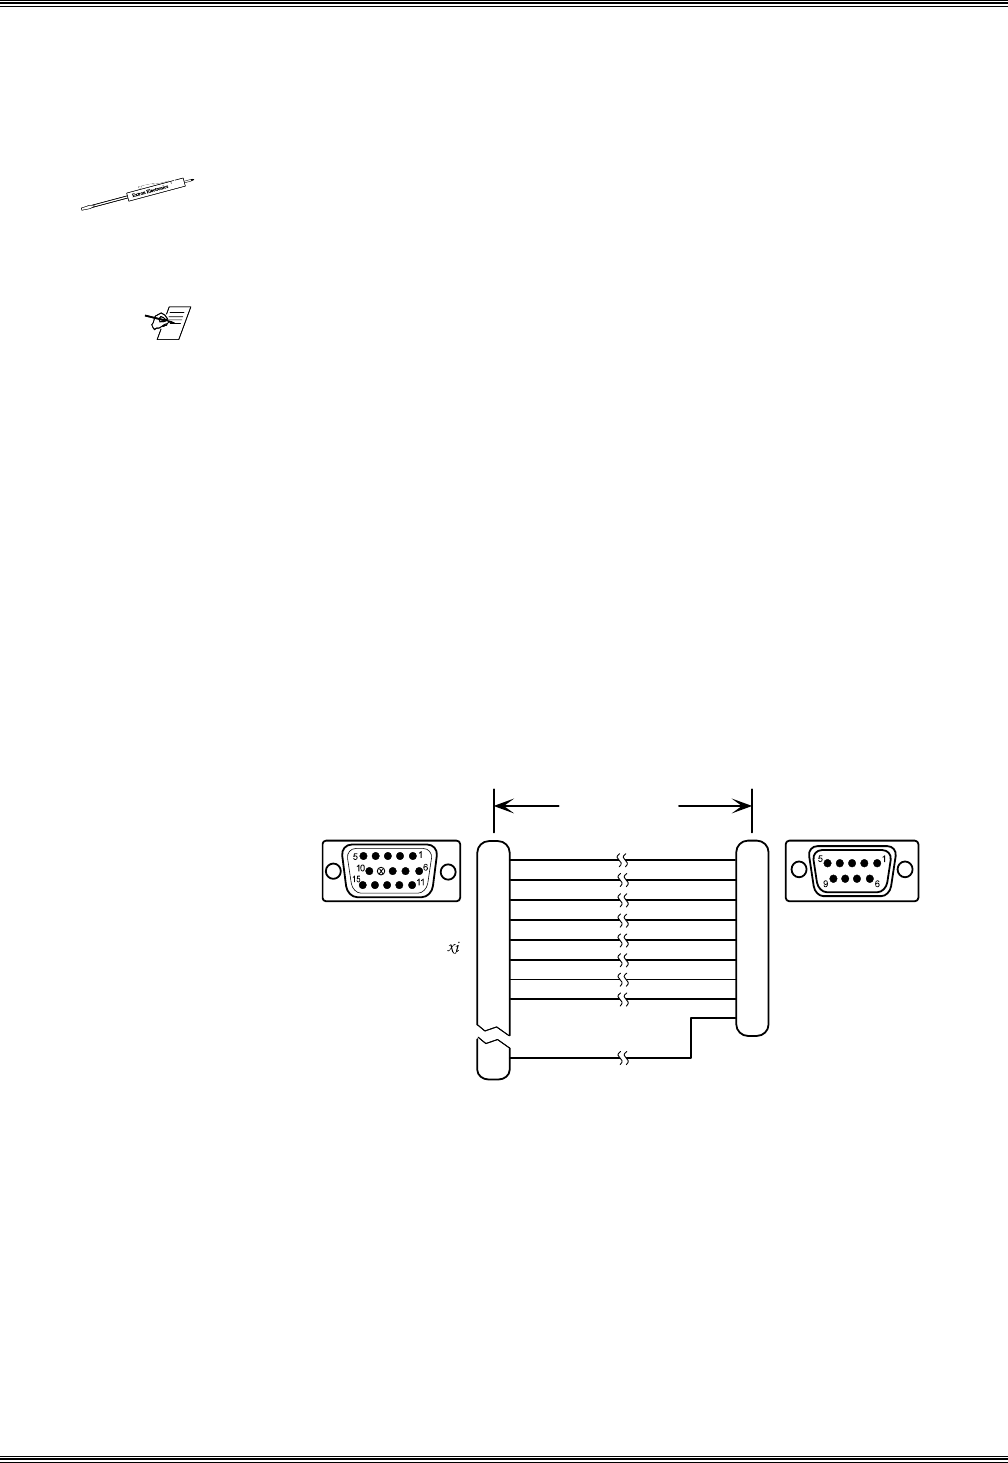
User-Supplied Cables
For custom installations, you may choose to make your own Projector
Communication cables (CC-xx'). Refer to the cable wiring diagram below for pin
connections. Cables may be up to 200' in length.
Figure 2-3. Communications Cable Wiring Diagram
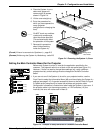
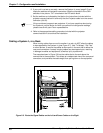
Removing the System 4xi Cover
If the System 4xi must be reconfigured for a different display device, it is
necessary to access the Main Controller board. Also, if the main power fuse
needs to be changed, you will need to access the inside of the unit. To do either
of these two things, you must first remove the top cover of the System 4xi, as
follows:
1. Unplug the AC power cord.
2. If rack-mounted, remove the System 4xi from the mounting rack.
3. Label the input and output cables and remove them.
2-3
1
2
3
4
5
6
7
8
15
1
2
3
4
5
6
7
8
9
Extron System 4
Switcher
15-pin D-Sub
High Density
Extron
Communications
Adapter
9-pin
D-Sub
Female
Female
200 Feet (max)