


Extron • System 4
xi
Switcher Series • User’s Manual
Chapter 3 • Using the System 4
xi
Front Panel
Menu Controls and Navigation
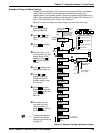
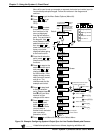
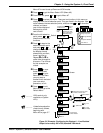
Figure 3-7 on page 3-12 shows a flowchart of all the menus. Use it as a road
map or guide to get to a specific one.
There are two groups of menus. There is a menu for each of the Picture Control
buttons on the front panel. These are explained on page 3-12 . The larger portion
of the flow diagram is a network of menus for setting up (or displaying) the
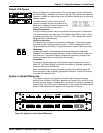
System 4xi input and output configuration, and are selected from the five Menu
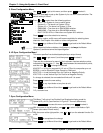
Control buttons on the Front Panel (shown above). The text and diagrams in this
section include symbols that represent these panel buttons. They are: , , ,
and
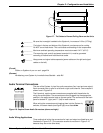
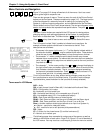
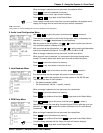
The Menu Control buttons are used with the LCD screen for viewing status,
changing settings, and making adjustments to the System 4xi configuration.
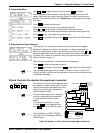
Each menu is described later. The Menu button ( ) is the starting point.
_______ Press at any time to leave a menu and return to the Select/Exit menu.
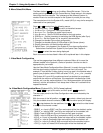
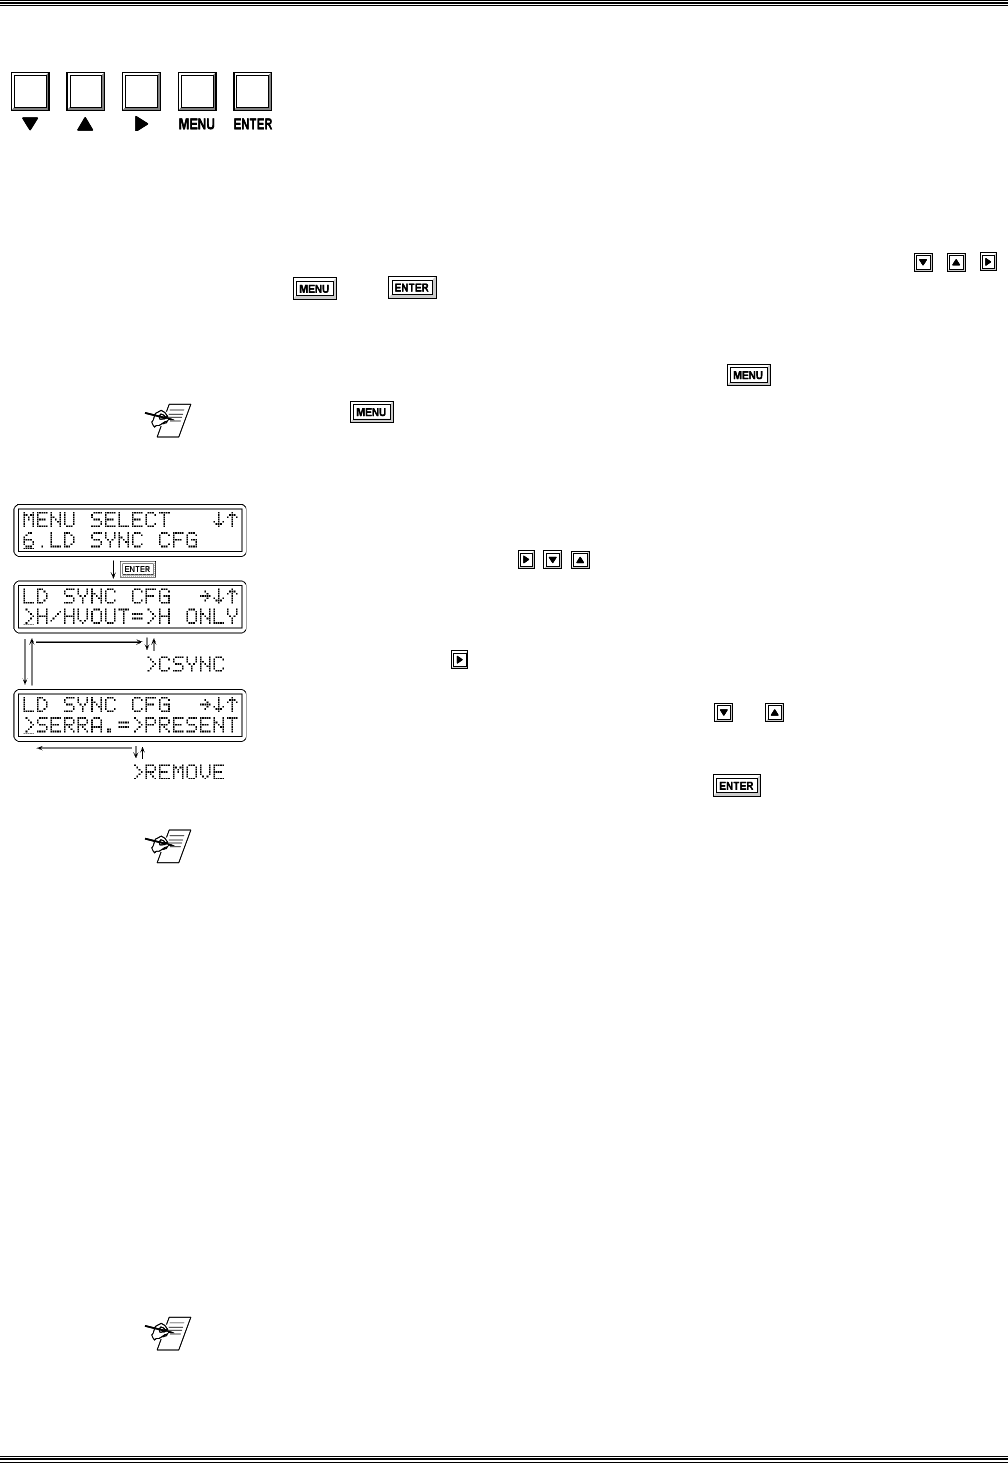
The LCD menus include "Help" symbols to indicate how to use them. An
example of these symbols can be seen in the menus to the left. Their
descriptions are as follows:
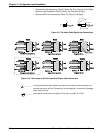
• The arrows in the upper-right corner (
® ¯
) of the display indicate which of
the direction buttons, , may be used with this menu. These buttons
allow the user to step forward, backward, or loop through menu choices.
• The character "
>
" marks a selection point where the user may choose
between two or more options. For menus that have more than one selection
point, use the button to step from one selection point to the next (and then
loop back to the first).
• The character "
_
" is the cursor position. Use or to change the display to
the right of the cursor and make a different selection. When a function blinks,
that indicates a tentative decision. That is, you have displayed something,
but have not yet made the selection. Press to select and save it. If a
function does not blink, it is already selected, or active.
_______ To exit a Control Menu at any time, without saving changes, press any of the
four input buttons to return to the Default menu. (If you don’t want to change
input selections, press the button for the input that is already selected.)
Terms used in LCD Menus
AUD = Audio
CHL = Input channel (used in Menu #9). It includes both Audio and Video.
CFG = Configuration, as in setup
H = Horizontal, as in horizontal sync
H/V = Horizontal and Vertical, as in composite sync (H and V)
LD = Line-doubled output (LQ = Line-quadrupled output)
RGB = Red, Green and Blue colors or video signals
RGsB = Red, Green and Blue, and the sync included with the Green signal
RGBS = Red, Green and Blue, and the Sync (H and V) on a 4th line
Slave = Another switcher whose output serves as an input to a System 4xi.
_m = Motion - use this for video with action.
_s = Still - use this for text or still pictures (slide presentations)
VID = Video
YC = S-Video, for the chrominance (C) and the luminance (Y)
V = Vertical, as in vertical sync
_______ The following pages have examples for using some of the menus, as well as
details on the function of each menu. Page 3-12 (Figure 3-7) has a flowchart of
the LCD menus. You may use it as a road map to go from one menu to another.
3-3