


22
Inverting and Mirroring the Image
If the image is displayed upside-down or backward, change the Projection option:
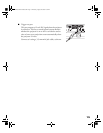
1. Press the
Menu button on the remote control.
2. Use the menu navigation buttons to open the
Setting
menu, then open the
Screen menu and select
Projection.
3. Choose from these options:
■ Front if the projector is located in front of the
screen (for example, on a table).
■ Front/Ceiling if the projector is located in front
of the screen and mounted overhead.
■ Rear if the projector is located behind the screen.
■ Rear/Ceiling if the projector is located behind the screen and mounted overhead.
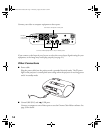
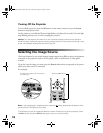
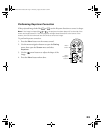
Positioning the Image
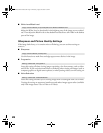
If the image is not centered on the screen, use the horizontal and vertical lens shift knobs to
adjust its position.
Note: You can display a test pattern to make adjustment easier. Press the Pattern button on the
remote control, then select Cross-hatching.
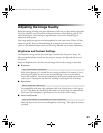
If you still need to raise the height of the image after using the vertical lens shift knob, lift the
front of the projector and rotate the adjustable feet until the image is positioned correctly.
You can also use the feet to correct the angle of the image if it’s tilted.
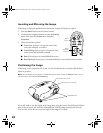
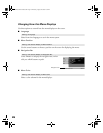
Menu
button
Menu
navigation
buttons
Adjustable feet
Vertical lens shift knob
Horizontal lens shift knob
PowerLite Cinema 200+.book Page 22 Thursday, August 18, 2005 2:37 PM