


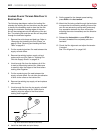
640t – Installation and Operating Instructions
Page 6-6
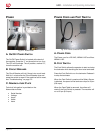
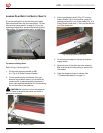
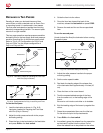
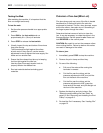
Fig. 6-9. Top Film Draped Over the Pressure Rollers and
Release Liner Attached to Take-up.
Pull the mounting film (or Kraft paper) up to 6.
about even with the top of the top pressure roller
without touching the sticky laminating film.
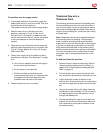
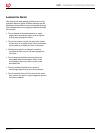
While pulling evenly, carefully align the edges of 7.
the mounting film with the laminating film, and
press the two together. It is important that the
tension is even from one end of the supply rolls
to the other.
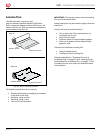
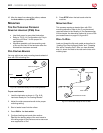
Fig. 6-10. Bottom Film or Kraft Paper Stuck to Top Film.
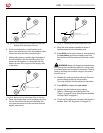
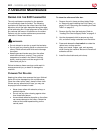
Press the straight edge of the threading card into 8.
the two films at the nip (the point between the
two pressure rollers) until the card and films are
slightly past the nip.
Fig. 6-11. Threading Card Inserted Between Films.
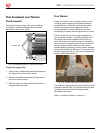
Move the roller pressure handle to where it 9.
applies pressure to the threading card.
Press 10. RUN on the control panel or while pressing
the foot switch, guide the threading card into
the machine until the rollers pull the card on their
own.
WARNING: Keep your ngers and hands away
from the nip point while the machine is running, they
could be trapped and crushed in the rollers. Clothing,
jewelry, and long hair could be caught in the rollers
and pull you in.
Release the card and ensure that both films and 11.
card are being pulled into the laminator.
The card will guide the film webs into the rollers.
Press 12. STOP or release the foot switch.
Replace the feed table and print clamp. 13.
Refer to “Removing and Installing the Print
Clamp” on page 6-3 and
“Removing and Installing
the Feed Table” on page 6-3
.
Check the film alignment and adjust the tension if 14.
needed. See “Film Alignment” on page 6-10.