


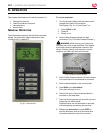

640t – Installation and Operating Instructions
Page 6-8
de c a l i n g in tW o pa s s e s
Decaling is where you laminate items and then
mount them on other materials such as Foam Core
or mounting board. It is performed in two passes.
The rst pass laminates and applies the mounting
adhesive, encapsulating the item. The second pass
mounts it on rigid material.
This two pass operation requires pressure sensitive
laminating lm on the top supply shaft and pressure
sensitive mounting lm on the bottom supply shaft.
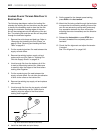
Refer to “Fig. 6-14. Congurations for Poly-in and
Poly-out Films.” for the proper conguration of
Poly-in or Poly-out lm.
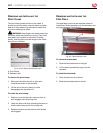
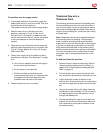
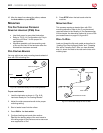
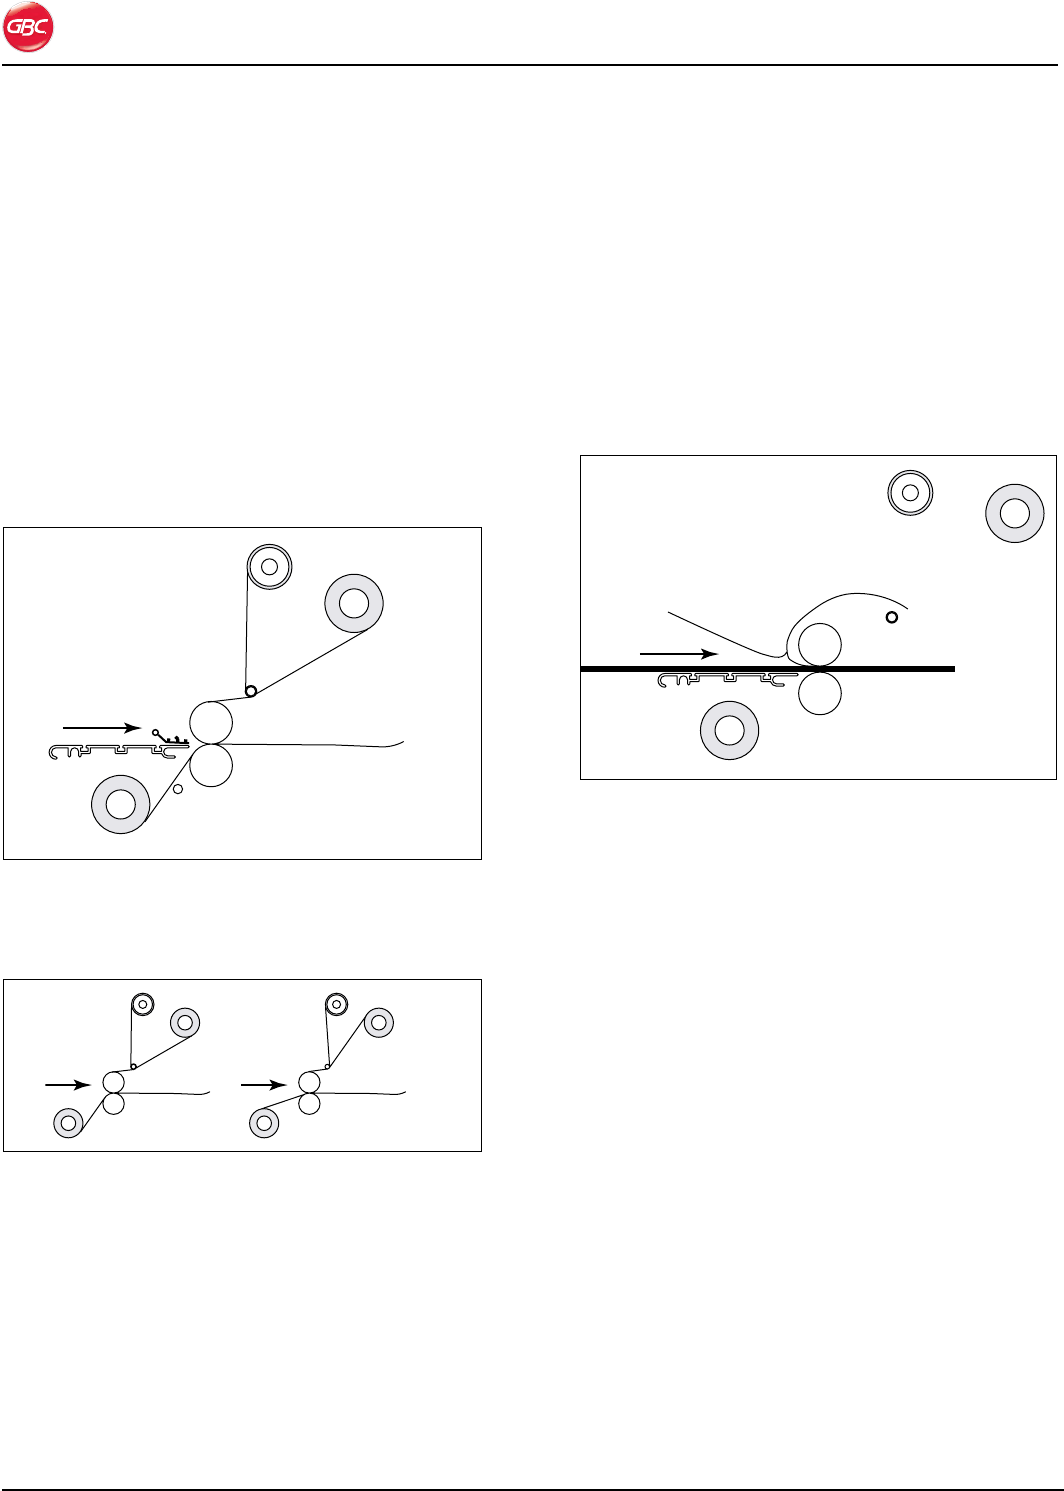
Release liner
Take-up
PSA Film
PSA mounting lm
Fig. 6-13. Laminator Loaded for Decaling the First Pass
with Film (Poly-in Shown).
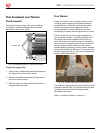
Poly-in
Poly-out
Fig. 6-14. Congurations for Poly-in and Poly-out Films.
To run the first pass:
Load the laminator as shown in “Fig. 6-13. 1.
Laminator Loaded for Decaling the First Pass
with Film (Poly-in Shown).”.
Adjust the roller pressure handle to the proper 2.
laminating setting.
Place the item to be laminated on the feed table 3.
and press RUN or the foot switch.
Guide the item into the rollers.4.
Once the item has cleared the back of the 5.
machine, release the foot switch or press STOP.
Remove the web and trim out the encapsulated 6.
item.
To run the second pass:
Unweb (unload the lms) the laminator before running
the second pass.
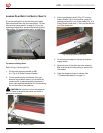
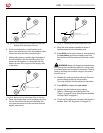
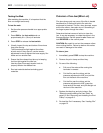
Release liner
Print over roller and idler bar
Fig. 6-15. Laminator Ready for Mounting.
Adjust the roller pressure handle to the proper 1.
mounting setting.
Set the motor speed to 2. min.
Peel back the leading edge of the release liner 3.
of the laminated item approximately 4 inches (10
cm).
Place the item on the mount board. 4.
Tack the exposed adhesive edge of the item, 5.
from the center out, to the leading edge of the
board.
Be sure to not introduce wrinkles or air bubbles.
Butt the leading edge of the board up against the 6.
rollers.
Drape the encapsulated item over the idler bar. 7.
Do not allow the print to flop backwards.
Press 8. RUN or the foot switch.
Immediately grasp the release liner for separation 9.
as the board is pulled into the rollers. Do not
allow the release liner to be pulled into the rollers.