Chapter 2— Operating the Printer Cd 39 Helvetica CondensedHelvetica
22 EasyCoder 3400e Bar Code Label Printer User’s Manual
15 Use PrintSet, your third-party software, or the IPL command set to
enable self-strip and the label taken sensor. Refer to the PrintSet online
help, your third-party documentation, or the IPL Programming
Reference Manual for help.
16 Press the Feed/Pause button to advance a label through the printer.
Grasp the leading edge of the label where it has separated from the
backing and pull it away from the printer.
17 Replace the printer cover. The printer is now ready to print labels.
Loading Thermal Transfer Ribbon
If you plan to use thermal transfer mode, you must install a thermal
transfer ribbon (TTR) to print in thermal transfer mode.
Note: Save the packaging that your ribbon came in. Attached to the
ribbon packaging is a small label with a three-digit sensitivity number
printed on it (Intermec ribbon only). You need this information to set the
correct media sensitivity number. Refer to the next section “Setting the
Media Sensitivity Number” for more information.
The core of your thermal transfer ribbon is either made of cardboard or
plastic. You need to use the correct core-locking brackets for your ribbon
core. The printer ships from the factory with the cardboard core-locking
brackets already attached.
Note: If you do not use the correct core-locking brackets, you may
experience printing problems or possible damage to the printer.
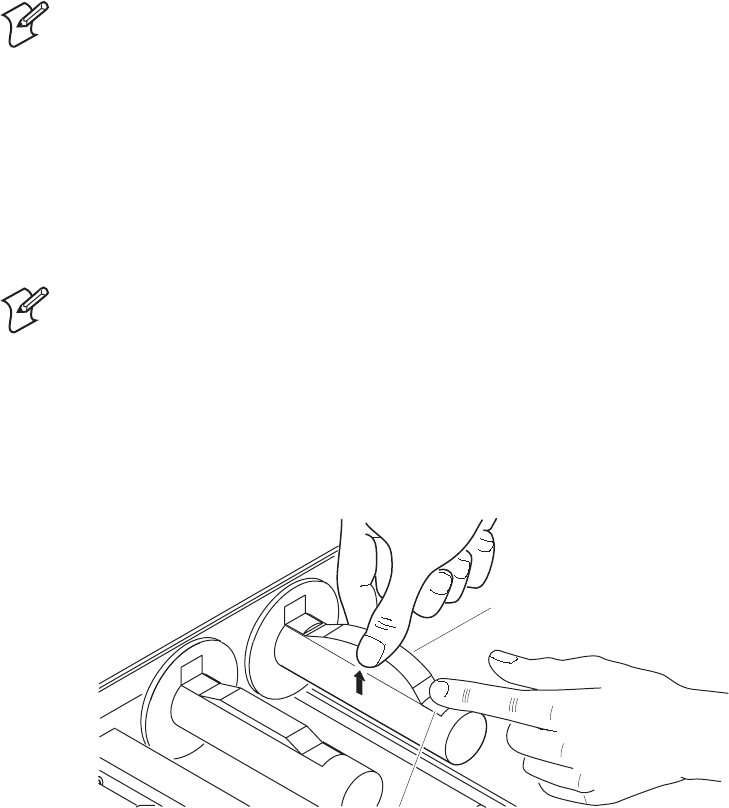
To change the cardboard core-locking brackets to plastic core-locking brackets
1 Pull up on the middle of the cardboard core-locking bracket (P/N
065375), while pushing down on one end with your index finger, until
the end of the bracket is free of the ribbon hub.
44XXU029.eps
Core-locking
bracket
Bracket slot
