


Removal and Replacement of Parts (without Calibration) 7-17
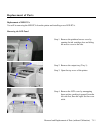
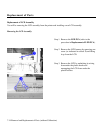
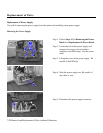
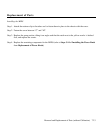
Step 4. Remove the output tray (Tray 1) by lifting
it up. Set it aside.
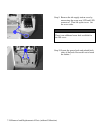
Step 5. Open the top cover of the printer.
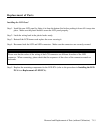
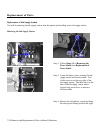
Step 6. Remove the LCD cover by unsnapping it
with your thumbs pushing it upward from
the left side first, then the right (facing the
printer). Set the cover aside.
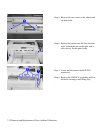
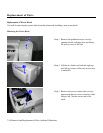
Step 7. Unscrew the two screws and set them
aside.
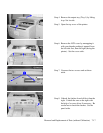
Step 8. Unhook the latches from left first, then the
right. Unlatch the one on the right with
the help of a screw driver if necessary. Be
careful not to break the latches. Set the
panel aside.