


Operating Overview 2-19
Using the Control Panel
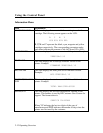
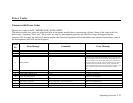
Aligning Printheads
To align the printheads from the LCD :
1. Press the [ Menu ] button until “Diagnostic Menu”.
2. Press the [ Item ] button until “Align Printheads”.
3. Press the [ Select ] button.
4. LCD message “Printing Pattern Page”.
5. Printer prints alignment page with horizontal and vertical alignment patterns.
6. The following screen appears on the LCD:
A B C D E
3 3 3 3 3
7. The value “3” at A is flashing.
8. By pressing value change the value at A that matches the corresponding straight line
on the test page.
9. When the value for A is correct press the [ Item ] button to skip to B.
10. When all values are set press the [ Select ] button.
11. The printer will display signs of activity. LCD message “Printing Confirm Page”.
12. The printer prints two squares and a cross. If the printed lines are straight, the
printhead alignment procedure is complete.
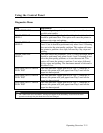
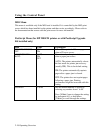
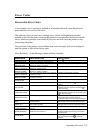
All pens Missing
When the message “ALL PENS MISSING” appears on the LCD one of two possible
situations apply. Either all print heads are missing from the carriage or at least one of the
print heads is experiencing an ink short.
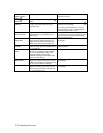
Following the message:
A. The printer will go automatically into Ink Head Diagnostic Process “Prt-Hd Diag”
appears
B. The user has to press “select” to start the Ink Head Diagnostic Process
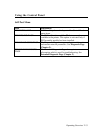
The diagnostic program will ask to insert the black print head only, after which the
printer will check the print head. Subsequently the user will be asked to add one print
head at the time and the diagnostic program will perform checks on each print head
added.