


46
Chapter 4
•
•
•
•
•
•
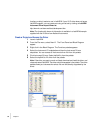
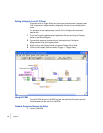
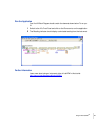
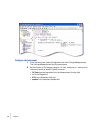
3 Connect the automation refnum and error terminals from Initialize Invoke Node
to DCVoltage.Configure Invoke Node.
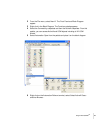
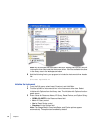
4 In the Class Browser, go back to the top-level object and double-click the
Trigger property and select the Delay property. Click Create Write and drag the
Property Node to the Block Diagram.
5 Create a constant and enter a value of 0.01 seconds for the Delay field.
6 Connect the automation refnum and error terminals from DCVoltage.Configure
Invoke Node to Trigger.Delay Property Node.
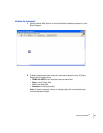
Take the Reading
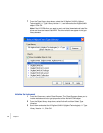
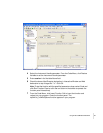
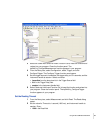
1 Return to the Class Browser, and under Properties and Methods, double-click
the Measurement property and select the Read method. Click Create and drag
the Invoke Node to the Block Diagram.
2 Set the value for Timeout to 1 second (1000 ms) by entering 1000 in the
MaxTimeMilliseconds field.
3 Connect the automation refnum and error terminals from Trigger.Delay
Property Node to Measurement.Read Invoke Node.
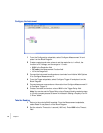
Display the Reading
Create an indicator for Measurement.Read from the Invoke Node terminal.
Close the Driver and Automation Sessions
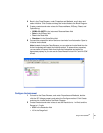
1 Return to the Class Browser, and under Properties and Methods, double-click
the Close method. Click Create and drag the Invoke Node to the Block
Diagram.
2 Close the Class Browser. From the ActiveX subpalette, select Close
Reference and place on the Block Diagram.
3 Connect the automation refnum and error terminals from Measurement.Read
Invoke Node to Close Invoke Node and then to Close Reference function.
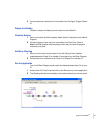
Add Error Checking
1 Return to the main functions palette. From the Dialog & User Interface
subpalette select Simple Error Handler VI and place it on the Block Diagram.
2 Connect the error information from Close Reference function to Simple Error
Handler VI.