


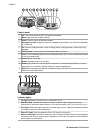


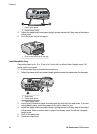

Control panel
1 On: Turn on the printer or put it into power save mode.
2 Back: Step back one screen at a time.
3 Home: Press to return to the home screen.
4 Navigation arrows: Adjust the crop box, navigate menu choices, and control the playback
of a video clip.
5 OK: Select a highlighted item, menu or dialog choice, and play/pause a video clip during
playback.
6 Print Preview: View a preview of the selected photo or photos.
7 Print: Print the selected photos from the inserted memory card, or from a camera connected
to the front camera port.
8 Cancel: Stops a print job.
9 Rotate: Rotate a photo or a crop box.
10 Zoom (+)(-): Zoom in or out of a photo or crop box. You can also press Zoom (-) to view
photos four at a time when viewing a photo at normal magnification.
11 Photo Fix: Automatically enhances and applies lighting, contrast, focus and red eye removal
features to all printed photos.
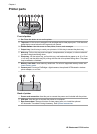
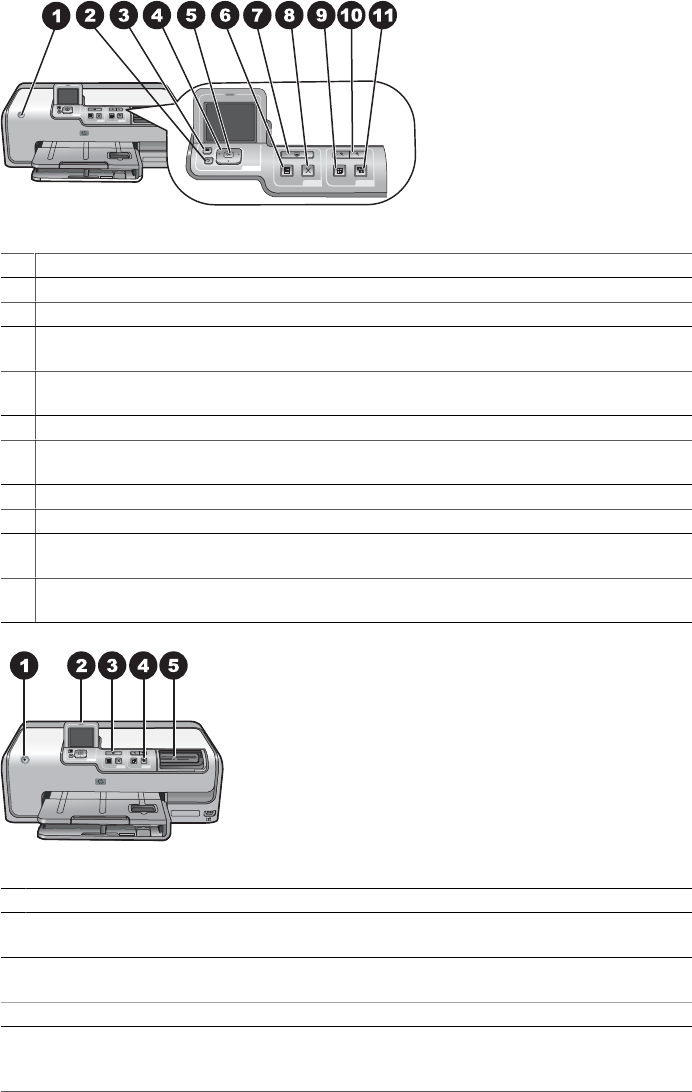
Indicator lights
1 On light: Solid blue if the printer is on, otherwise it is off.
2 Attention light: Flashes when there is an error condition. See the printer screen for
instructions or information about the error. For more information, see The Attention light is on.
3 Print light: Solid blue when the printer is on and ready to print, flashes blue when the printer
is printing or busy with self-maintenance.
4 Photo Fix light: Solid blue when the Photo Fix function is turned on.
5 Memory Card light: Solid blue if a memory card is inserted, flashes if the printer is accessing
a memory card, off if no memory card is inserted or if more than one card is inserted. See the
printer screen for instructions.
Chapter 1
8 HP Photosmart D7100 series