


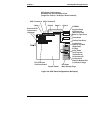
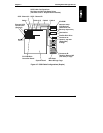


Chapter 4 Installing Mass Storage Devices
52
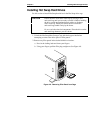
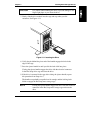
3. If working on a pedestal-mounted NetServer, remove the bezel and gain
access to the HP NetServer’s non-hot swap-drive bays.
Refer to Chapter 3, "Opening and Closing the HP NetServer."
4. If working on a rack-mounted NetServer, follow the appropriate
instructions to safely extend the NetServer from the rack.
Refer to Chapter 3, "Opening and Closing the HP NetServer."
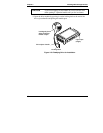
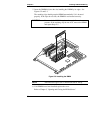
5. Select an available drive bay for the device and remove the filler panel.
6. Configure the device according to the manufacturer’s instructions.
Refer to SCSI addressing in the "Mass Storage Guidelines" section earlier
in this chapter.
7. If you are installing a boot device, check the boot priority described earlier
in this chapter.
8. If the device does not already have a storage tray or mounting hardware,
install the appropriate mounting hardware on the device.
Refer to the directions included with the device’s mounting hardware.
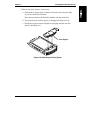
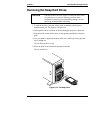
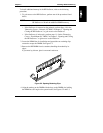
9. Slide the drive into the open shelf and secure the drive using the two
mounting screws included with the mounting hardware or filler panel.
10. Connect the power cable and the appropriate data cable (SCSI) from the
system board or SCSI controller to the device.
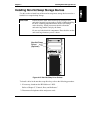
11. Replace the cover.
Refer to Chapter 3, "Opening and Closing the HP NetServer."
12. If the NetServer is rack mounted, slide it back into the rack and secure it.
Refer to Chapter 3, "Opening and Closing the HP NetServer."
13. Replace the bezel.
Refer to Chapter 3, "Opening and Closing the HP NetServer."
14. Return power to the NetServer and run the Setup Utility to configure the
device.