


3-44 Installation and Service Guide
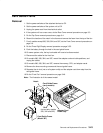
Replacement
1. Do the “Front Fan” replacement procedure on page 3-46.
2. Do the Three-digit replacement procedure on page 3-55
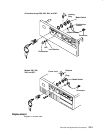
Attention: On models 380, 390, 39H, and 397, assure that the 3-digit LED shield is oriented
the same as the LED.
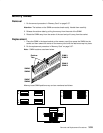
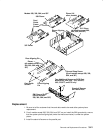
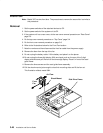
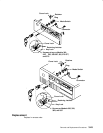
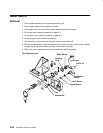
3. Install the air duct (not on all system units) and the adapter card down stop on the card
guide frame.
4. Connect the cables.
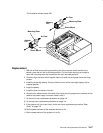
5. Align the cards with the correct slots in the card guide frame and install the card guide
frame with the three mounting screws. Ensure that the reset button operates freely in the
front cover. Adjust the card guide if necessary.
6. Connect all cables.
7. Install the foam on the top of the fan.
8. On some system units, the key lock cable may have to be reconnected.
9. Do the Battery replacement procedure on page 3-58.
10.For all models, except 380, 390, 39H, and 397, do the Front Cover replacement
procedure on page 3-6.
11. Do the Top Cover replacement procedure on page 3-4.
12.If the system unit has a rear cover, do the Rear Cover replacement procedure on page
3-3.
13.Plug the power cord into the electrical outlet.
14.Set the power switches of the attached devices to On.
15.Set the power switches of the system unit to On.