


3-46 Installation and Service Guide
Front Fan
Note: Model 397 has two front fans. The procedures to remove the second fan is similar to
this procedure.
Removal
1. Set the power switches of the attached devices to Off.
2. Set the power switch of the system unit to Off.
3. If the system unit has a rear cover, do the rear cover removal procedure on “Rear Cover”
page 3-3.
4. Do the top cover removal procedure on “Top Cover” page 3-4.
5. Do the front cover removal procedure on page 3-6.
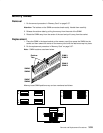
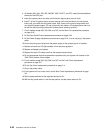
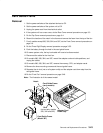
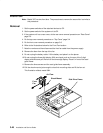
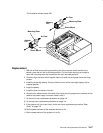
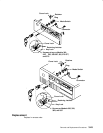
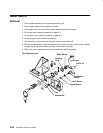
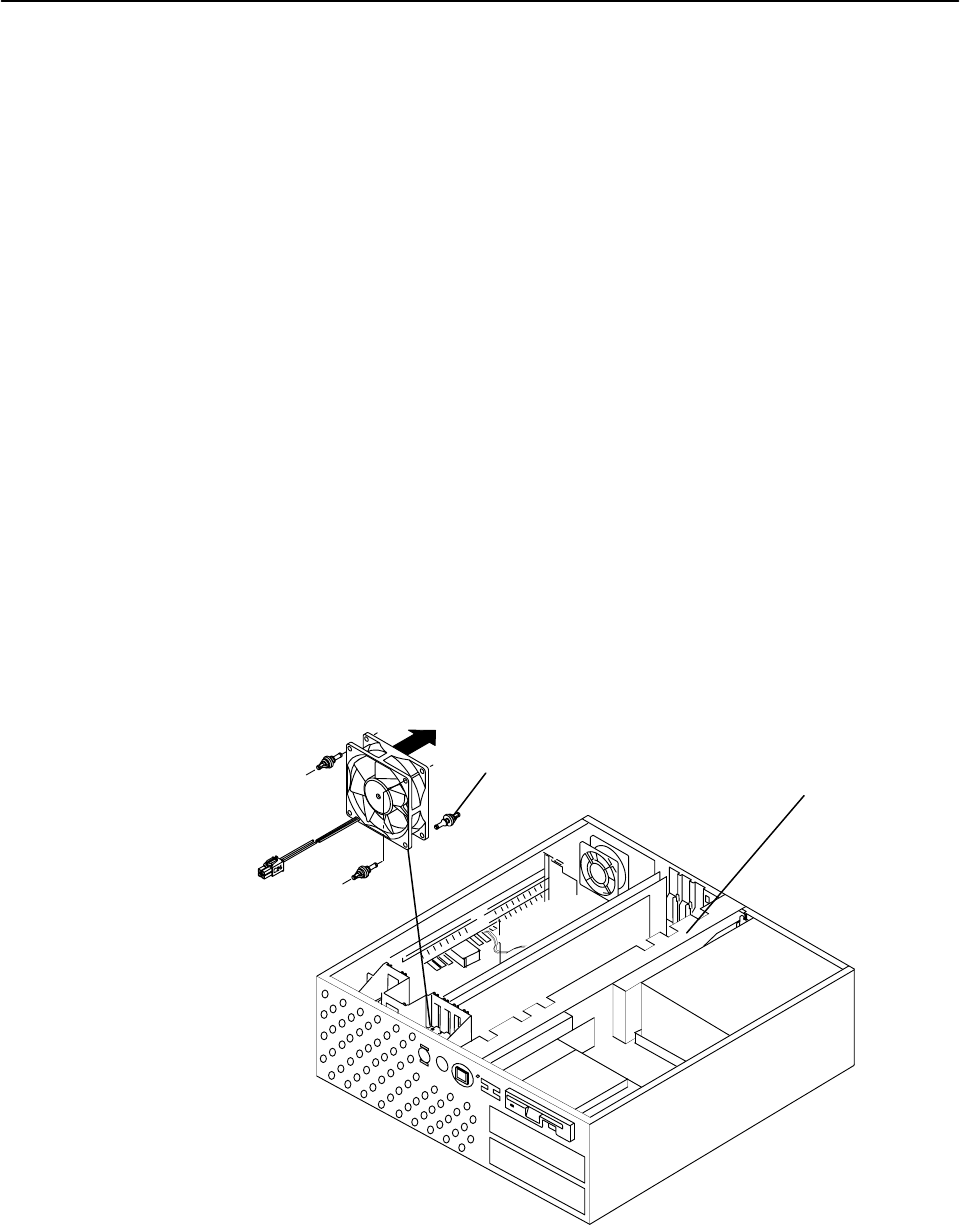
6. Refer to the illustrations below for the Front Fan location.
7. Note the number and then disconnect the front fan cable from the power supply.
8. Remove the foam from the top of the fan.
9. Do not unplug the battery cable. Lift the battery and place it on the planar.
10.Do not unplug the three-digit display. With one hand, push on the rear of the 3-digit
display and twist and pull the front of the three-digit display. Place it in front of the card
guide frame.
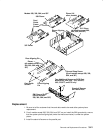
11. Remove the three screws and the card guide frame assembly.
12.Pull the shock mounts just enough to clear their mounting slots and lift the fan out.
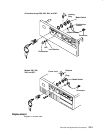
This illustration reflects model 39H.
Front
Fan
Shock Mount
Air Flow
Disk Drive Frame