Diagnostics 35
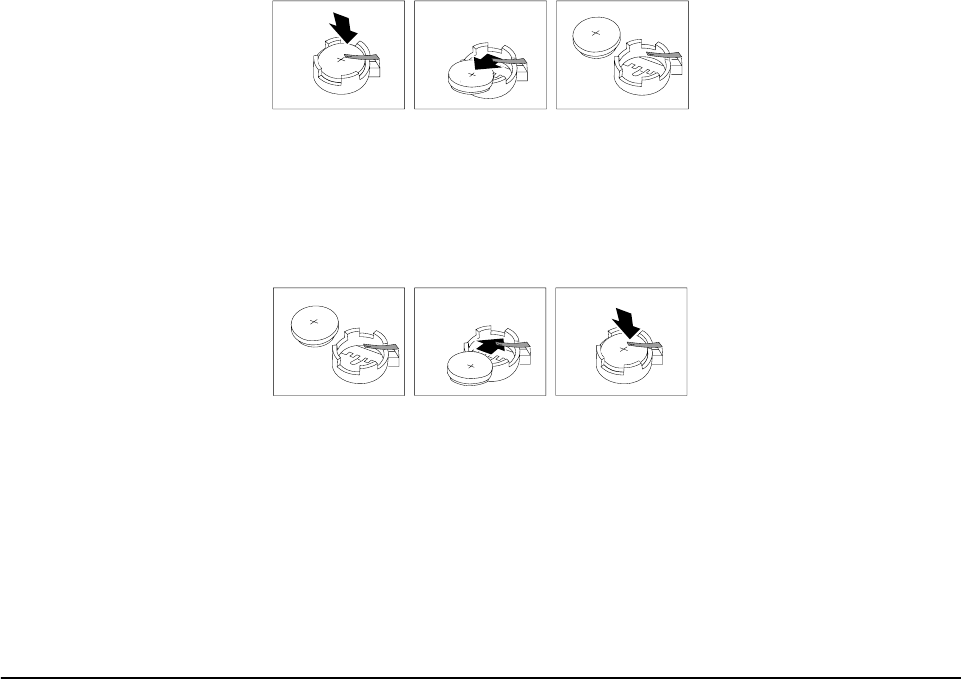
c. Use your thumb and index finger to pull the battery from under the battery
clip.
d. Ensure that the battery clip is touching the base of the battery socket by
pressing gently on the clip.
8. Insert the new battery:
a. Tilt the battery so that you can insert it into the front of the socket, under the
battery clip.
b. As you slide it under the battery clip, press the battery down into the socket.
9. Reinstall any adapters that you removed.
10. Insert the plastic dividers into the divider guides.
11. Reinstall the top cover.
Note: You must wait approximately 20 seconds after you plug the power cord of
your server into an electrical outlet before the power control button
becomes active.
12. Start the Configuration/Setup Utility program and set configuration parameters
as needed. Refer to “Using the Configuration/Setup Utility program” on page 45.
Diagnosing errors
To find solutions to problems that have definite symptoms, see “Error symptoms” on
page 153.
If you cannot find the problem there, go to “Starting the diagnostic programs” on
page 26 to test the server.
If you have just added new software or a new option and the server is not working, do
the following before using the error symptoms table:
• Remove the software or device that you just added.
• Run the diagnostic tests to determine if the server is running correctly.
• Reinstall the new software or new device.
Troubleshooting the Ethernet controller
This section provides troubleshooting information for problems that might occur with
the 10/100 Mbps Ethernet controller.
