Getting Started - RAID Array 410 for Windows NT – Intel
EK–SMRAC–IG. C01 4–7
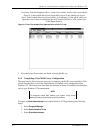
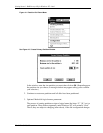
Figure 4–7 Format Menu
6. Continue to format each new partition until all partitions have been formatted.
7. When all partitions have been formatted, close Disk Administrator. At this point, the
configuration has been completed, and is recognized by Windows NT.
4.1.3 Changes to RAID Array Configuration
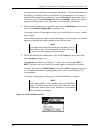
NOTE
To safeguard critical data, backup your system using normal
backup procedures before altering device partitions.
Do not alter partitions that contain important data.
When making changes to an existing RAID Array configuration, any existing disk partitions
to be changed (or removed) must first be deleted using Windows NT Disk Administrator.
After they have been deleted, you may use the RAID Array 410 Manager to create new Stor-
agesets (refer to the RAID Array 410 Manager for Windows NT, to make the changes).
To remove disk partitions, run
Disk Administrator from within Windows NT by performing
the following steps:
1. Select
Program Manager
2. Select Administrative Tools
3. Select Disk Administrator
Delete the partitions you intend to change (or remove) by performing the following steps:
1. From
Disk Administrator, select (click on) the partition you wish to delete.
2. Pull down the
Partition menu.
3. Choose
Delete, then continue.
4. Continue selecting and deleting the partitions until you have done so to all the partitions
you wish to change.
5. Go back to the
Partition pull down menu and click on Commit Changes Now.
6. At this point all the disks you intend to reconfigure have been deleted from Windows
NT. You may now reconfigure the RAID Array using the RAID Array 410 Manager as
described in the manual RAID Array 410 Manager for Windows NT User’s Guide.


