Chapter 2 — Configuring the PB50
30 PB50 Mobile Label and Receipt Printer User’s Guide
4 From the host PC, check the wireless settings.
If you have an IPL version of the printer, send these commands to
the PB50:
<STX><SI>wt,SSID<ETX>
<STX><SI>wt,WEP1<ETX>
<STX><SI>wt,WEP2<ETX>
<STX><SI>wt,WEP3<ETX>
<STX><SI>wt,WEP4<ETX>
<STX><SI>wt,AUTH<ETX>
<STX><SI>wt,WPA<ETX>
<STX><SI>wt,WPA2<ETX>
<STX><SI>wt,WPA_PSK<ETX>
<STX><SI>wt,ROAM<ETX>
<STX><SI>wt,PWR_MODE<ETX>
<STX><SI>wt,CHANNEL<ETX>
<STX><SI>wt,AP_MAC<ETX>
<STX><SI>wt,SIGNAL<ETX>
<STX><SI>wt,SPEED<ETX>
<STX><SI>wt,ACTIVE<ETX>
If you have a Fingerprint version of the printer, send this
command to the PB50:
setup write "wlan","uart1:"
5 Set up the PB50 to use the correct SSID and authentication
modes. See one of the following procedures to configure wireless
printing on your IPL or Fingerprint printer.
6 If you are going to use certificates for validation, transfer the
certificate to the printer. The printer can accept .pfx, .pem, and
.der certificates.
7 Verify that the PB50 is connected to the access point and make
sure it has an IP address allocated to it.
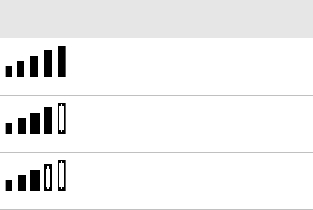
Understanding the 802.11 Radio Icons
Icon Description
Excellent signal
Strong signal
Good signal


