


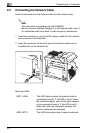


Installing the Printer Driver
3
3-7
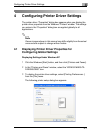
Installing the Printer Driver Using the Add Printer Wizard Under
Windows 2000
1 With Windows running, insert the CD-ROM into the CD-ROM drive of
your computer.
2 Click the Windows [Start] button, point to [Settings], and then click
[Printers].
3 Double-click the “Add Printer” icon.
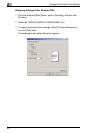
4 Click the [Next] button.
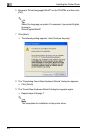
5 Select “Local printer”. (Do not check the “Automatically detect and
install my Plug and Play printer” box.), and then click [Next] button.
✎
Note
❍ For details on specifying network settings, refer to Chap.6
“
Network Printing in a Windows Environment (Available only with
FAX3900). Since other network settings must first be specified,
temporarily install the printer driver under a local connection.
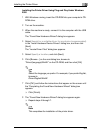
❍ For the network printer settings, consult with the network
administrator.
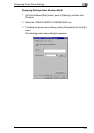
6 Specify the port (LPT1, 2, etc.) where the printer controller is
connected, and then click [Next] button.
7 Click the [Have Disk] button.
8 Click the [Browse] button.
9 Specify the printer driver directory on the CD-ROM for the
environment being used, and then click the [OK] button.
✎
Note
When instructed to specify the driver, browse to
“Driver\English\Win2K” on the CD-ROM.
10 Click the [Next] button.
11 Follow the instructions that appear on your computer screen to
complete the installation.