2
Installing the Printer Driver
2-12 IC-202
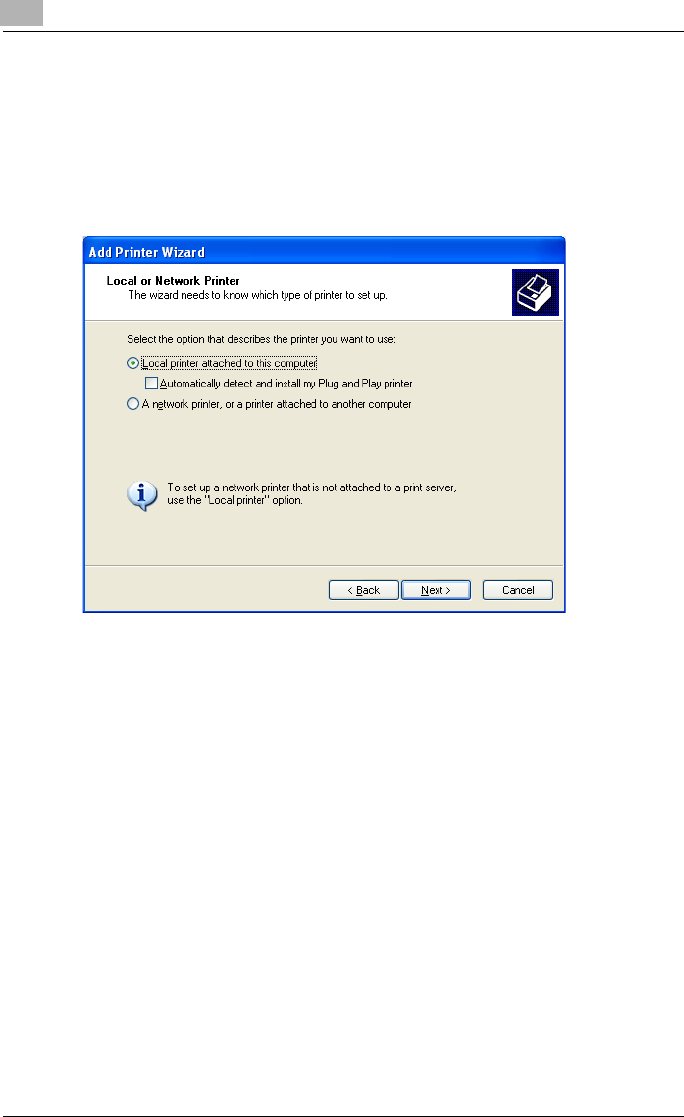
The Add Printer Wizard starts up.
4 Click the [Next].
5 Select [Local printer attached to this computer].
– Clear the [Automatically detect and install my Plug and Play printer]
check box and then click the [Next].
6 The Select Printer Port dialog box appears. Select [LPT1] here, and
then click the [Next].
– Usually LPT1 is used when connecting in the parallel port.
7 Click the [Have Disk].
8 Click the [Browse].
9 Depending on the language, operating system and printer driver that
you are using, specify the folder on the CD-ROM that contains the
printer driver, and then click [Open].
– Refer to “Print Controller CD-ROM Configuration” on page 1-1 for
the folder containing the printer driver.
– When the application Adobe PageMaker is used, copy the PPD file
in the [PPD_PageMaker] folder into an appropriate folder. (For more
details, refer to the Adobe PageMaker manual.)


