


3. Lay the server on its side for easier operation.
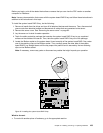
4. Locate the RAID card, which is installed in the PCI-E slot 3 on the system board. See “System board
components” on page 42.
5. Remove any parts or disconnect any cables that might impede your operation.
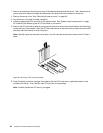
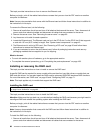
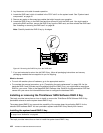
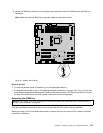
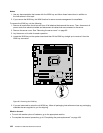
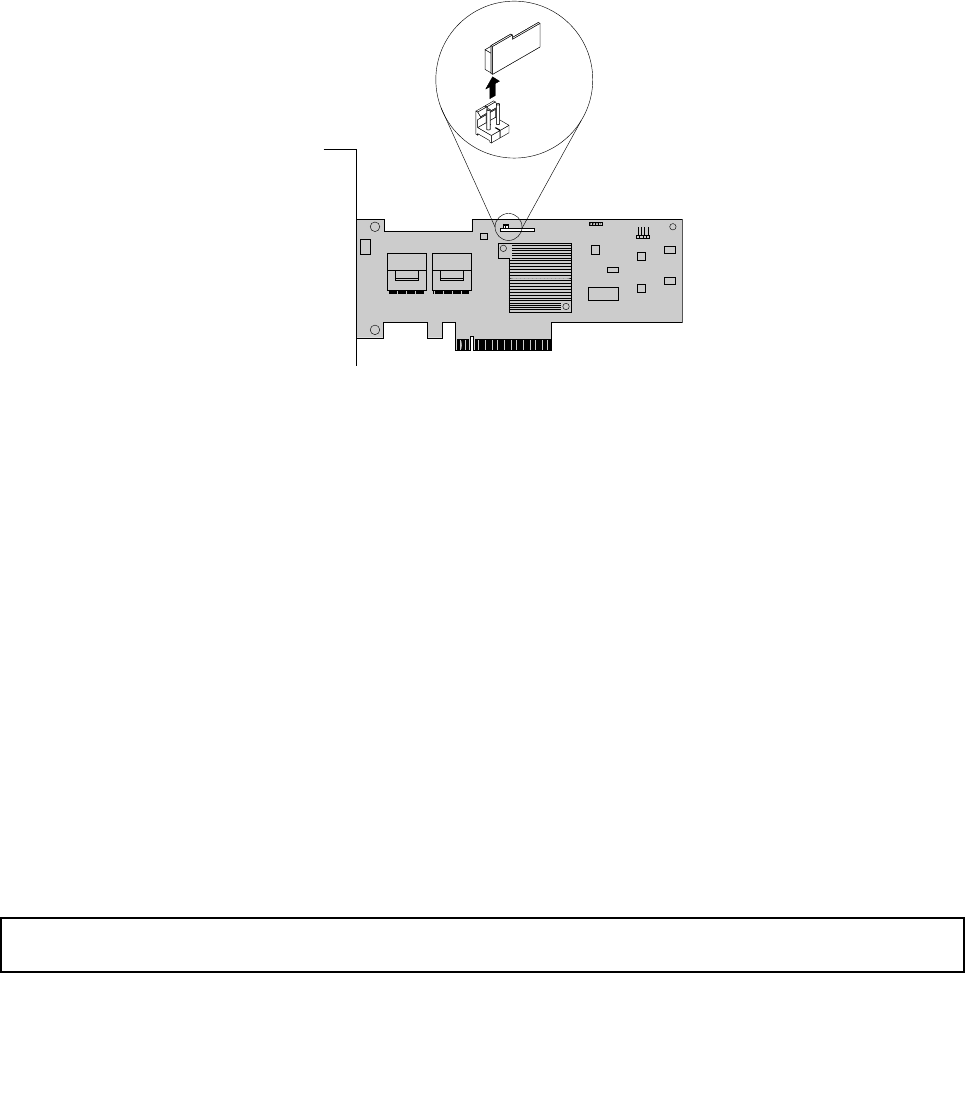
6. Locate the RAID 5 key on the RAID card and then remove it from the RAID card. You might need to
remove the RAID card rst, remove the RAID 5 key from the RAID card, and then reinstall the RAID card.
See “Installing or removing the RAID card” on page 98
.
Note: Carefully handle the RAID 5 key by its edges.
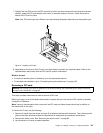
Figure44. Removing the RAID 5 key from the RAID card
7. If you are instructed to return the old RAID 5 key, follow all packaging instructions and use any
packaging materials that are supplied to you for shipping.
What to do next:
• To work with another piece of hardware, go to the appropriate section.
• To complete the removal procedure, go to “Completing the parts replacement” on page 168. As the
hardware RAID 5 and 50 levels are not available without the RAID 5 key, you might need to recongure
RAID for your server. Refer to the MegaRAID SAS Software User Guide on the documentation DVD that
comes with your server for information about how to congure the hardware RAID.
Installing or removing the ThinkServer SATA Software RAID 5 Key
This topic provides instructions on how to install or remove the ThinkServer SATA Software RAID 5 Key
(hereinafter referred to as the system board RAID 5 key).
The system board RAID 5 key expands the capability of the system board by activating RAID 5 for the
onboard SATA software RAID. You can purchase a system board RAID 5 key directly from Lenovo.
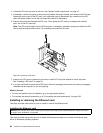
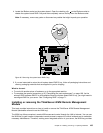
Installing the system board RAID 5 key
Attention: Do not open your server or attempt any repair before reading and understanding the “Safety information”
on page iii
and “Guidelines” on page 83.
This topic provides instructions on how to install the system board RAID 5 key.
102 ThinkServer Hardware Maintenance Manual