


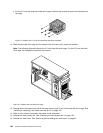


2. Remove the server cover. See “Removing the server cover” on page 85.
3. Remove the front bezel. See “Removing and reinstalling the front bezel” on page 87.
4. Locate the hot-swap hard disk drive backplane(s). See “Hot-swap hard disk drive backplane” on
page 34
.
5. Remove the front system fan. See “Replacing the front system fan” on page 149.
6. Remove all the installed hot-swap hard disk drives and dummy trays (if any) from the hard disk drive
cage. See “Installing or replacing a hot-swap hard disk drive” on page 119
.
7. Note down the cable connections on the backplane and then disconnect all the cables from the
backplane.
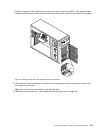
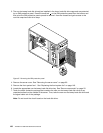
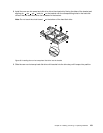
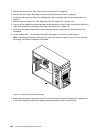
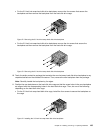
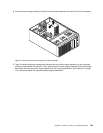
8. Lift the release latch 1 and slide the hard disk drive cage out of the front of the chassis.
Note: The following illustration shows the 3.5-inch hard disk drive cage. For the 2.5-inch hard disk
drive cage, the removal procedure is the same.
Figure71. Removing the hard disk drive cage
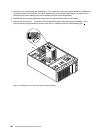
9. Depending on whether your server has a 2.5-inch hot-swap hard disk drive cage with backplane or
3.5-inch hot-swap hard disk drive cage(s) with backplane(s), do one of the following:
134 ThinkServer Hardware Maintenance Manual