


Setting the date and time
You can set the date and time so that they are printed on every fax you send.
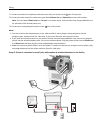
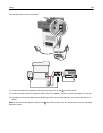
1 Open a Web browser, and then type the printer IP address in the address field.
Notes:
• View the printer IP address on the printer home screen. The IP address appears as four sets of numbers
separated by periods, such as 123.123.123.123.
• If you are using a proxy server, then temporarily disable it to load the Web page correctly.
2 Click Security > Set Date and Time.
3 In the Manually Set Date & Time field, enter the current date and time.
4 Click Submit.
Note: It is recommended to use the network time.
Configuring the printer to observe daylight saving time
The printer can be set to automatically adjust for daylight saving time:
1 Open a Web browser, and then type the printer IP address in the address field.
Notes:
• View the printer IP address on the printer home screen. The IP address appears as four sets of numbers
separated by periods, such as 123.123.123.123.
• If you are using a proxy server, then temporarily disable it to load the Web page correctly.
2 Click Security > Set Date and Time.
3 Select the Automatically Observe DST check box, and then enter the DST start and end dates in the Custom Time
Zone Setup section.
4 Click Submit.
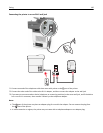
Sending a fax
You can use the printer to send a fax to one or more recipients in a number of ways. You can type the e‑mail address,
use a shortcut number, or use the address book. You can also use the Multi Send or MyShortcut application from the
printer home screen. For more information, see the "Activating the home screen applications" section of the User’s
Guide.
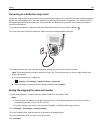
Sending a fax using the printer control panel
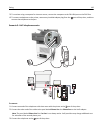
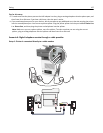
1 Load an original document faceup, short edge first into the ADF tray or facedown on the scanner glass.
Notes:
• Do not load postcards, photos, small items, transparencies, photo paper, or thin media (such as magazine
clippings) into the ADF tray. Place these items on the scanner glass.
Faxing 134