


Scanner does not respond
Check the control panel
for any blinking lights
If one of the lights is blinking, see “Blinking lights on the control panel” on page 53.
Check power
If the light is not on, see “Power button is not lit” on page 42.
Make sure the printer is set
as the default printer and
is not on hold or paused.
1 Click:
• In Windows XP Pro: Start Settings Printers and Faxes.
• In Windows XP Home: Start Control Panel Printers and Faxes.
• In Windows 2000: Start Settings Printers.
2 Double-click the name of your printer.
3 Click Printer.
• Make sure no check mark appears next to Pause Printing.
• Make sure a check mark does appear next to Set As Default.
Software may not be
installed correctly
For more information, see “Software may not be installed correctly” on page 44.
Scan was not successful
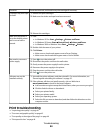
USB cable may not be
connected
1 Check the USB cable for any obvious damage.
2 Firmly plug the square end of the USB cable into the back of the printer.
3 Firmly plug the rectangular end of the USB cable into the USB port of the computer.
The USB port is marked with the
USB symbol.
Reboot computer Turn off and then restart your computer.
Software may not be
installed correctly
For more information, see “Software may not be installed correctly” on page 44.
Scanning takes too long or freezes the computer
Other software may be
running
Close all programs not being used.
Change the scanning
resolution to a lower
value
1 Load an original document facedown on the scanner glass.
2 From the desktop, double-click the Lexmark Imaging Studio icon.
3 From the left pane of the Welcome screen, click Scan.
4 Click Custom Settings.
5 Select a lower scan resolution.
6 Click Start.
Troubleshooting
49