


Poor scanned image quality
Check the control panel
for any blinking lights
If one of the lights is blinking, see “Blinking lights on the control panel” on page 53.
Clean the scanner glass If the scanner glass is dirty, gently wipe it with a clean, lint-free cloth dampened with
water.
Adjust the quality of the
scan
1 Load an original document facedown on the scanner glass.
2 From the desktop, double-click the Lexmark Imaging Studio icon.
3 From the left pane of the Welcome screen, click Scan.
4 Click Custom Settings.
5 Select a higher scan resolution.
6 Click Start.
Review steps to improve
print quality
See “Improving print quality” on page 37.
Are you scanning from
photo or glossy paper, a
magazine, or a
newspaper?
If you are copying or scanning from photo or glossy paper, a magazine, or a newspaper,
see “Removing image patterns from photos, magazines, or newspapers” in the
“Scanning” chapter of the User's Guide on the CD.
Check quality of original
document
If the quality of the original document is not satisfactory, try using a clearer version of
the document or image.
Check document
placement
Make sure the document or photo is loaded facedown on the scanner glass in the lower
right corner.
Partial document or photo scans
Check document
placement
Make sure the document or photo is loaded facedown on the scanner glass in the lower
right corner.
Check paper size Make sure the paper size being used matches the size you selected.
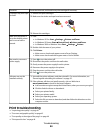
Fax troubleshooting
Review the fax checklist Make sure:
• The printer is connected to a computer that is equipped with a fax modem.
• The computer is connected to a working phone line.
• Both the printer and the computer are turned on.
For additional help when you are using a fax application, see the documentation that
came with the fax application.
Jams and misfeeds troubleshooting
• “Paper jams” on page 51
• “Paper or specialty media misfeeds” on page 51
Troubleshooting
50