


• Make sure all paper sizes and types are set correctly in the printer control panel menus.
• Store paper per manufacturer recommendations.
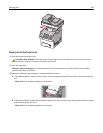
Understanding jam numbers and locations
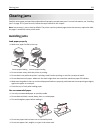
When a jam occurs, a message indicating the jam location appears on the printer display. Open doors and covers, and
remove trays to access jam locations. To resolve any paper jam message, you must clear all jammed papers from the
paper path.
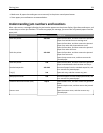
Area name Jam numbers What to do
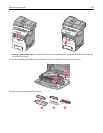
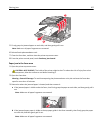
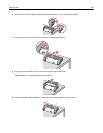
Inside the printer 200–201 Open the front door, and then remove the jammed
paper from behind the toner cartridge area.
Open the front door, and then remove the jammed
paper from under the photoconductor units.
Open the front door, and then remove the jammed
paper from under the fuser.
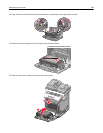
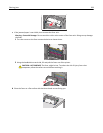
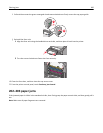
Inside the printer 202–203 Open the front door, and then remove the jammed
paper from fuser area.
Open the top access cover, and then remove the
jammed paper.
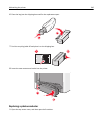
Inside the printer 230 Open the front door, and then remove the jammed
paper located between the front door and Tray 1.
Standard output bin 202–203 Remove all paper from the standard output bin, and
then remove the jammed paper.
Tray [x] 24x Open each tray, and then remove any jams.
Multipurpose feeder 250 Remove all paper from the multipurpose feeder, and
then remove the jammed paper.
Automatic Document Feeder (ADF) 29y.xx Open the ADF cover, and then remove any jammed
paper.
Open the duplex cover, and then remove the jammed
paper.
Scanner cover Open the scanner cover, and then remove any
jammed paper.
Clearing jams 254