


Printing photos from a flash drive
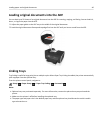
1 Load photo paper.
2 Insert a flash drive or digital camera set to mass storage mode.
If image files and document files are stored in the memory device, then press the left or right arrow button to select
Photos, and then press .
Note: Only files with supported file types will be shown.
3
Use the up or down arrow button to select a photo printing option, and then press .
•
Select and Print allows you to choose a layout, the number of photos per page, paper settings, photo
size, photo quality, and to sharpen the quality of graphics.
•
Print Photos allows you to print all photos, selected photos by photo range, and print photos using
predefined photo size templates.
4 To adjust the print settings, press the up or down arrow button to scroll to the option you want to set, and then
press the left or right arrow button to scroll to the setting you want. If necessary, press to make a selection.
5 Press .
Note:
For best results, allow the prints to dry at least 24 hours before stacking, displaying, or storing.
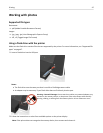
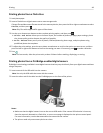
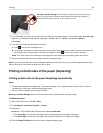
Printing photos from a PictBridge-enabled digital camera
PictBridge is a technology available in most digital cameras that lets you print directly from your digital camera without
using a computer.
1 Insert one end of the USB cable into the camera.
Note: Use only the USB cable that came with the camera.
2
Insert the other end of the cable into the PictBridge port on the front of the printer.
Notes:
• Make sure that the digital camera is set to the correct USB mode. If the camera USB selection is incorrect,
then the camera is detected as a flash drive, or an error message is displayed on the printer control panel.
For more information, see the documentation that came with the camera.
• The printer reads only one memory device at a time.
Printing 48