


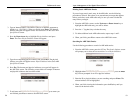

Deleting Static ARP Table Entries
If you no longer need a static entry in the ARP table, use the following
procedure to delete it. Since there is no precautionary message that appears
before you delete a static ARP table entry, be sure you want to delete the
entry before you begin.
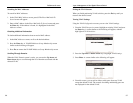
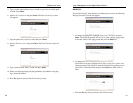
1. From the ARP Table screen, use the Up Arrow or Down Arrow key to
highlight the ARP table entry you want to delete.
2. Press the “-” (hyphen) key to delete the entry.
3. To delete additional static ARP table entries, repeat steps 1 and 2.
4. When you finish, press Esc to return to the ARP Table screen.
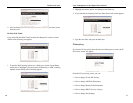
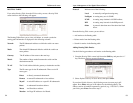
Searching for ARP Table Entries
Use the following procedure to search for ARP table entries:
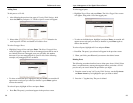
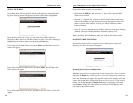
1. From the ARP Table screen, press the “S” key. The Search Options screen-
will prompt you to select an Internet Address or a Physical Address.
2. Highlight either Internet Address or Physical Address and press the Enter
key. You are prompted for an IP or physical address.
3. Enter the IP or physical address you are searching and press Enter. The
selected address will be highlighted.
4. When you finish viewing the information, press the Esc key until you
return to the desired screen.
51
ProConnect II
®
Series
50
Layer 2 Management 4-Port Gigabit Ethernet Switch
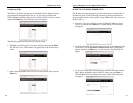
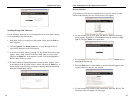
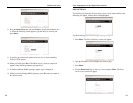
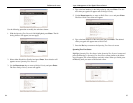
3. Type an Internet address. The address consists of numbers separated by
periods (e.g., 129.32.0.11). When you finish, press Enter. The Internet
address you typed will appear next to Internet Address in the Static ARP
Specifications screen.
4. Press the Down Arrow key to highlight Physical Address and press
Enter. The Enter Physical Address screen will appear.
5. Type the corresponding physical address and press Enter. The physical
address you typed will appear next to Physical Address in the Static ARP
Specifications screen.
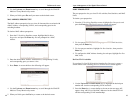
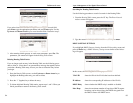
6. Press Esc. The Internet and physical addresses you typed will appear in
the ARP Table screen. The following screen shows an example of Internet
and physical addresses that have been added.
7. To add more static ARP table entries, repeat steps 1 through 6. When you
are finished, press Esc to return to the ARP Table screen.