Hardware Installation
Smartio C168H/HS User’s Manual 2-3
software configuration program will automatically update the hardware settings.
After this, users already complete the whole installation.
4. Shutdown System (Windows NT/95/98).
5. DO power OFF and then ON (or Reset) the PC. (Please cold start.)
6. Restart System (Windows NT/95/98).
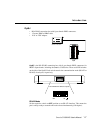
It is very important to keep the JP1 always short in this case. Without running the
hardware configuration program, Io-irq.exe under DOS prompt, the software
configuration program will automatically update the hardware settings of the board
while updating the software settings. This saves the trouble doing hardware
configuration. However, remember to
cold start the system every time the
configuration changed.
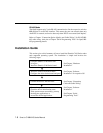
Hardware Installation with IO-IRQ Utility
This section is for those who can not use quick hardware installation:
u Install two or more Smartio C168 Series boards in a system.
u Fail to install, due to the I/O address 0xA700 is not available or has conflict in
the system.
u Use operating systems other than Windows NT and 95/98.
Before proceeding the
software installation, detailed in the next chapter, “Software
Installation”, do
hardware configuration to setup the I/O address and IRQ with
“Io-irq.exe”, detailed in the next section.
Remember to keep the hardware settings in mind for the software installation.
The
Smartio C168 Series has the following default (factory) settings:
I/O address :
0x180 (Port 1), 0x188 (Port 2), 0x190 (Port 3), 0x198 (Port 4)
0x1A0 (Port 5), 0x1A8 (Port 6), 0x1B0 (Port 7), 0x1B8 (Port 8)
IRQ : 10
INT Vector : 0x1C0


