1-7
3D REFORM
3D A
SELECT
LENS SHIFT
FOCUS ZOOM
DOWN
LEFT RIGHT
UP
Z
STATUSPC CARD 2PC CARD 1 LAMP 1 LAMP 2 POWER
ON/STAND BY
AUTO ADJUST
M
E
N
U
E
N
T
E
R
C
A
N
C
E
L
F
1
7
2354
61314 118912
10
Top Features
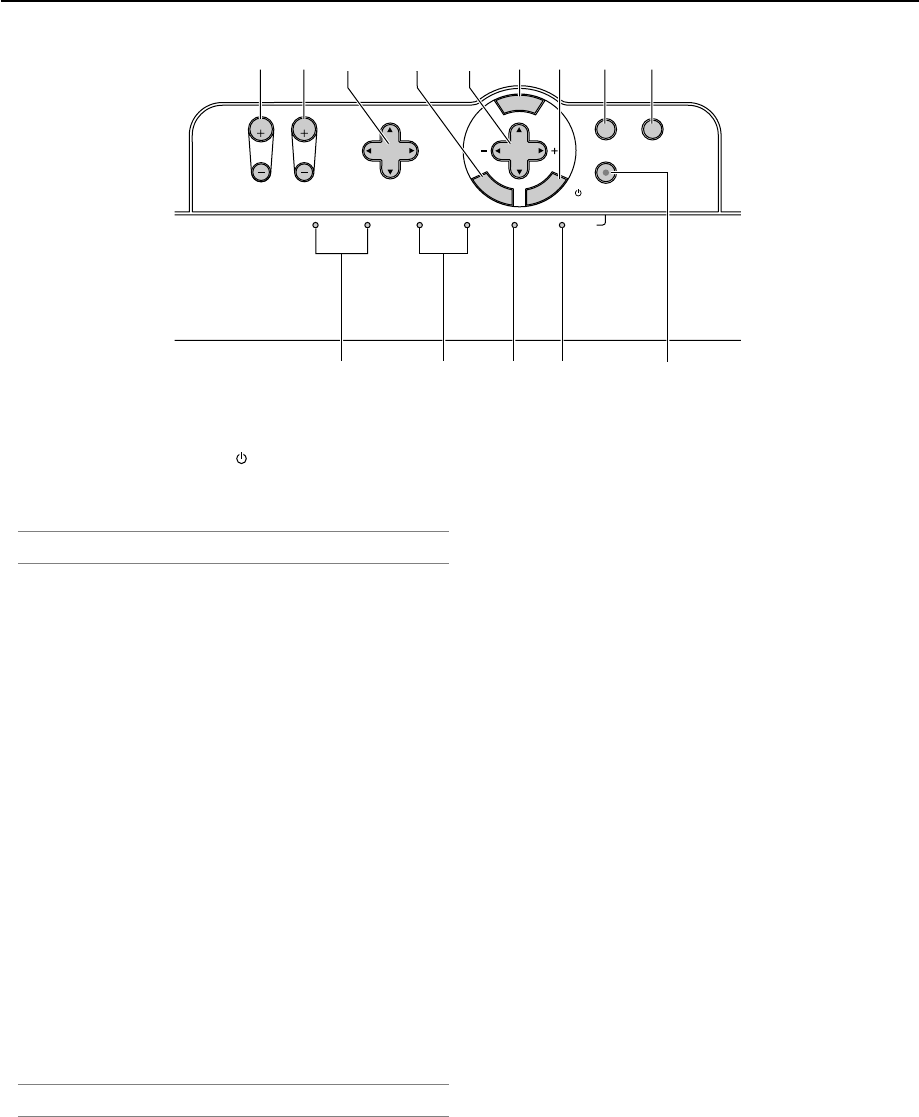
1. POWER Button (ON / STAND BY)( )
Use this button to turn the power on and off when the main
power is supplied and the projector is in standby mode or idle
mode.
NOTE: To turn on or off the projector, press and hold this button for a minimum
of two seconds.
2. POWER Indicator
When this indicator is green, the projector is on; when this
indicator is orange, it is in standby or idle mode. See the Power
Indicator section on page 10-3 for more details.
3. STATUS Indicator
If this light blinks red rapidly, it indicates that an error has oc-
curred, the lamp cover is not attached properly or the projector
has overheated. If this light remains orange, it indicates that
you have pressed a cabinet key while the Control Panel Key
Lock is enabled. See the Status Indicator section on page 10-
3 for more details.
4. LAMP Indicator 1/2
If this light blinks red rapidly, it's warning you that the lamp has
reached the end of its usable life. After this light appears, re-
place the lamp as soon as possible (See page 9-2). See the
Lamp Indicator section on page 10-3 for more details.
5. PC CARD Access Indicator 1/2
Lights while accessing a PC card.
6. 3D REFORM Button
Press this button to enter 3D Reform mode to correct the key-
stone (trapezoidal) distortion, and make the image square.
Press to toggle between Cornerstone and Keystone adjust-
ment mode.
NOTE: Pressing and holding this button for a minimum of 2 seconds will reset
3D Reform correction setting values to zero.
7. AUTO ADJUST Button
Use this button to adjust Position-H/V and Pixel Clock/Phase
for an optimal picture. See page 3-6.
8. MENU Button
Displays the menu.
9. SELECT ̆̄̇̈ (+) (–) / Volume Buttons
̆̄ : Use these buttons to select the menu of the item you
wish to adjust. When no menus appear, these buttons
work as a volume control.
̇̈ : Use these buttons to change the level of a selected menu
item. A press of the ̈button executes the selection. When
the menus or the Viewer tool bar is not displayed, these
buttons can be used to select a slide, or to move the
cursor in Folder List or Slide List.
10. ENTER Button
Executes your menu selection and activates items selected
from the menu.
11. CANCEL Button
Press this button to exit "Menus". Press this button to return
the adjustments to the last condition while you are in the ad-
justment or setting menu.
12. LENS SHIFT ̆̄̇̈ Button
Adjust the lens offset by shifting the projected image position
horizontally and / or vertically.
13. ZOOM Button (+/-)
Zoom the lens in and out.
14. FOCUS Button (+/-)
Adjust the lens focus.
1. Introduction
