8-10
Selecting Gamma Correction Mode
Use the ̇ or ̈ buttons to choose one mode from three options.
Each mode is recommended for :
Dynamic ......For true color reproduction of natural tones
Natural.........Normal settings
Black Detail .For dark portions of a picture
Selecting Color Correction
Adjusts red, green, blue, yellow, magenta, cyan and color gain
each independently to correct the tint of the whole screen.
Adjusting Color Temperature
This feature adjusts the color temperature using the slide bar.
Checking "Color Temperature" enables the color temperature slide
bar.
Adjusting White Balance
Press the White Balance button to access the Contrast/Bright-
ness adjustment for each R, G, and B.
NOTE: The White Balance is not available for Viewer and LAN.
Selecting Base Setting
This feature allows you to use color correction or gamma values
as reference data to optimize for various types of images. You
can select one of the following five settings.
• Presentation • Graphic • Movie
• sRGB • Video
Image Options
Pixel Adjust
Displays the Clock and Phase adjustments.
Clock ...........Use this item to fine tune the computer image or
to remove any vertical banding that might ap-
pear.
Phase ..........Use this item to adjust the clock phase or to re-
duce video noise, dot interference or cross talk.
(This is evident when part of your image appears
to be shimmering.) Use the ̇ and ̈ buttons to
adjust the image.
Use "Phase" only after the "Clock" is complete.
Position
Adjusts the image location horizontally and vertically using the
SELECT ̇and ̈ buttons.
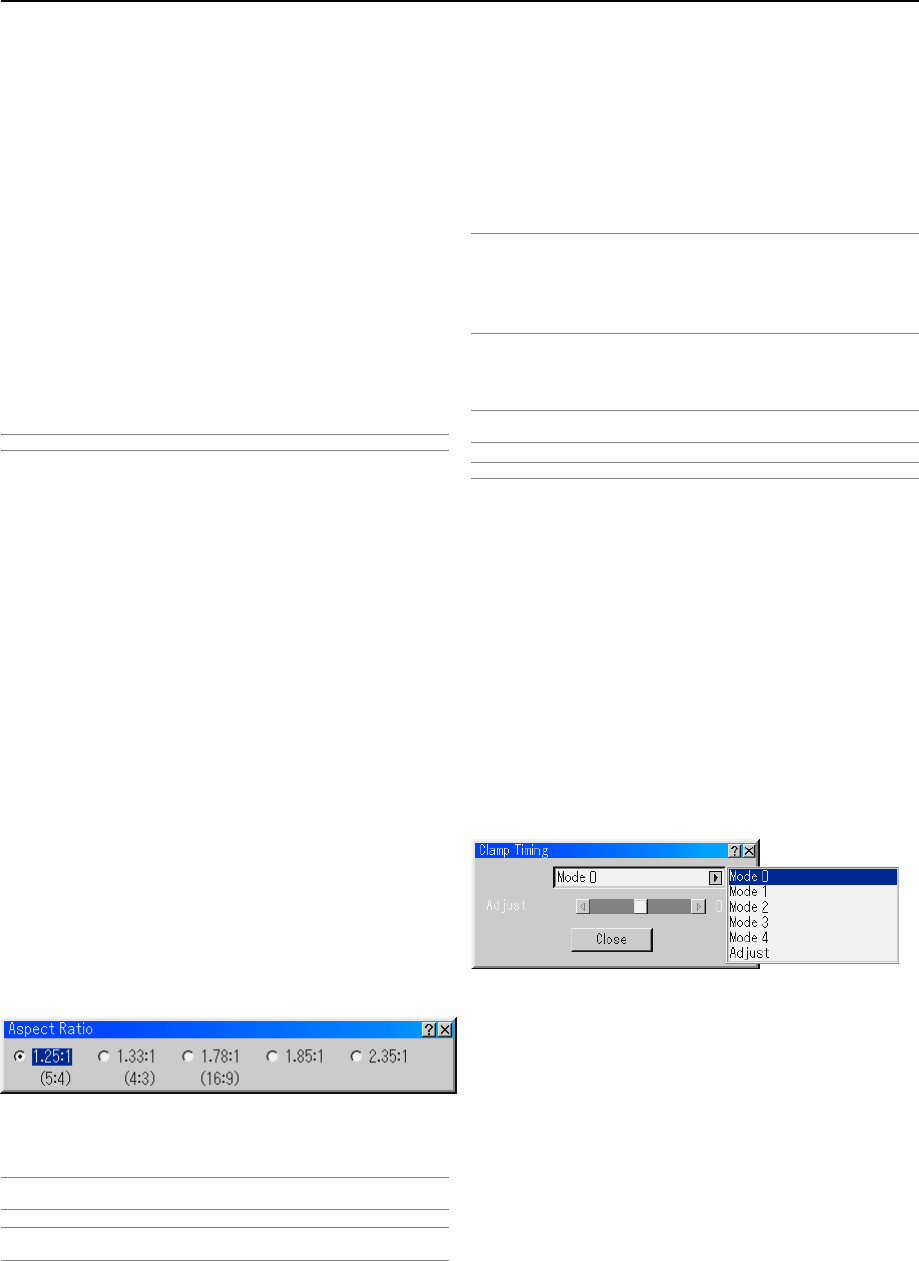
Aspect Ratio
You can select the aspect ratio for input signal.
Select the appropriate aspect ratio using the SELECT ̇ or ̈
button.
NOTE: When "Resolution" is set to "Native", this feature is not available, and the
aspect ratio is set to “1.33:1 (4:3)”.
NOTE: When “S2” is selected in “S-Video Mode Select” and the S2 signal is de-
tected, this feature is not available.
Resolution
This allows you to activate or deactivate the Advanced AccuBlend
feature.
Auto .............Turns on the Advanced AccuBlend feature. The
projector automatically reduces or enlarges the
current image to fit the full screen.
Native ..........Turns off the Advanced AccuBlend feature. The
projector displays the current image in its true
resolution.
NOTE:
* When "Resolution" is set to "Native", "3D Reform", "Aspect Ratio", "Screen" and
"Overscan" are not available.
* While you are displaying an image with higher resolution than the projector's
native resolution (GT6000: SXGA+ and GT5000: XGA), "Resolution" is not avail-
able.
Overscan
Select overscan percentage (0%, 5%, 10% and 25%) for signal.
NOTE: When "Resolution" is set to "Native", this feature is not available, and the
stored settings and adjustments are invalid.
NOTE: The "0%" option may not be available depending upon the input signal.
Video Filter (not available for Video, Component, Viewer and
LAN)
This function reduces video noise.
Off ...............The filter is removed.
Less.............The low-pass filter is applied partially.
More ............The low-pass filter is applied fully.
Blanking
This feature allows you to mask any unwanted area of the screen
image.
Adjust the Top, Bottom, Left or Right blanking with the SELECT
̇ or ̈ button.
Option Adjust
Clamp Timing
According to the signal, this function sets the detection position
(i.e., clamp position) of the black level reproduction of the analog
input signal. Normally this is not used.
Mode 0-4 .....Select the appropriate one.
Adjust ..........This permits the video clamp position for each
signal to be set. Use "Adjust" when a clamp tim-
ing error occurs at the time of special analog sig-
nal reception such as 1080P. Note that "Adjust"
is not valid for doubler signals such as NTSC
and PAL.
To delete the "Clamp Timing" setting screen, select the SELECT
̄ button and press the ENTER button, or press the remote con-
trol CANCEL button.
8. Using On-Screen Menu
