


12
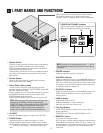
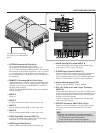
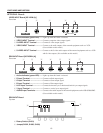
1.PART NAMES AND FUNCTIONS
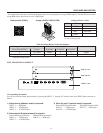
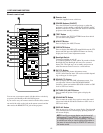
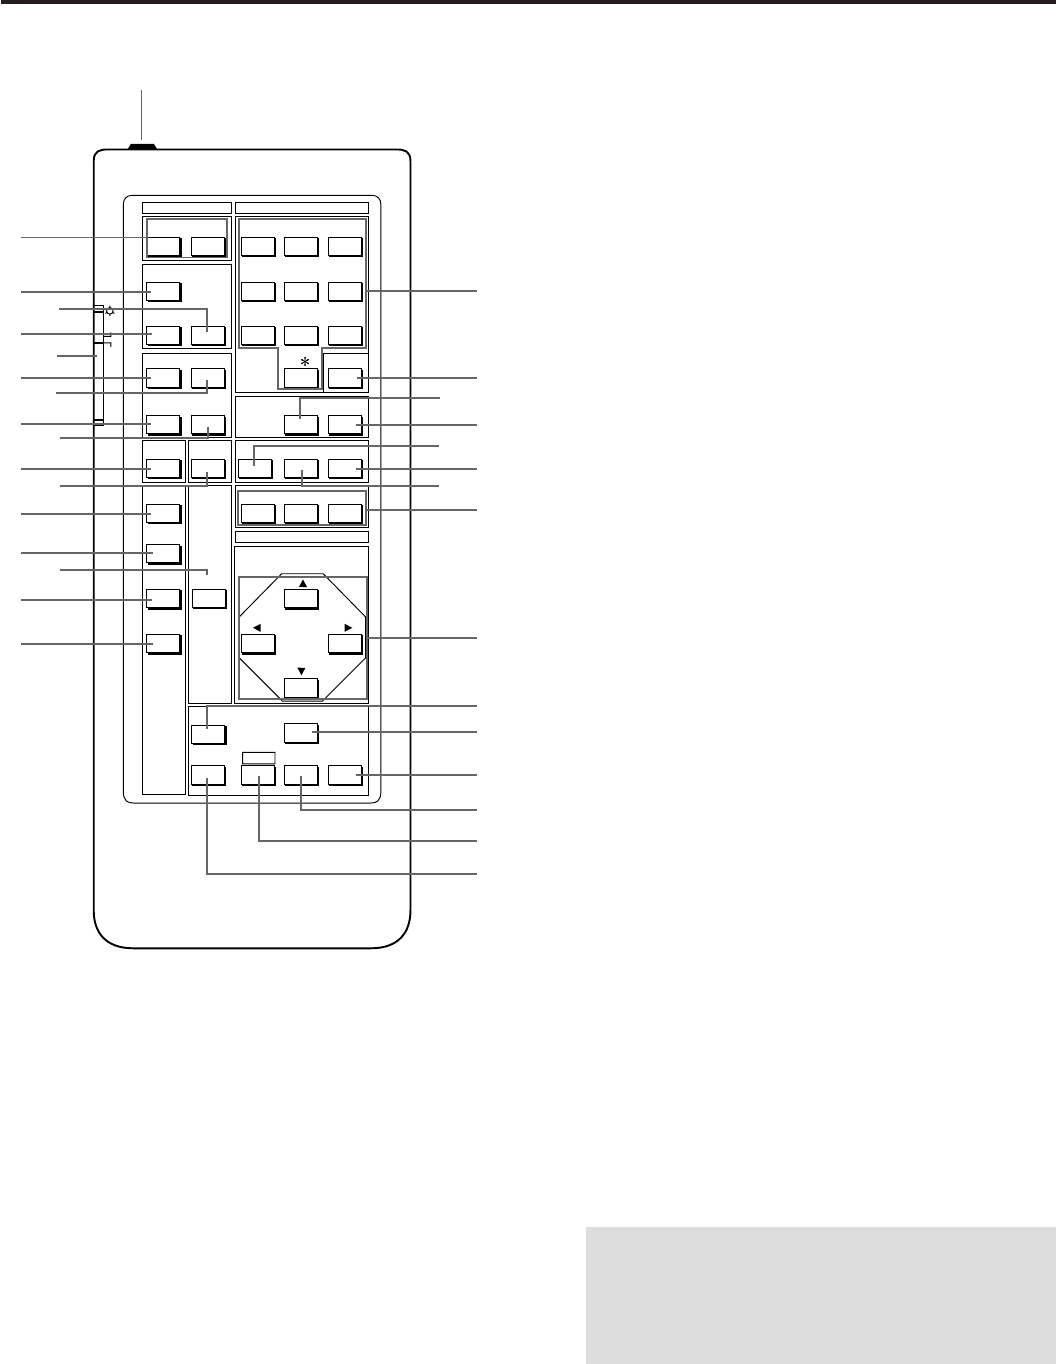
Remote control unit
1 Remote Jack
Insert the supplied remote cable here.
2 POWER Buttons (ON/OFF)
Press the ON button to turn the projector on when the
projector is in the standby condition (STANDBY and RC
READY indicators lit). Press the OFF button to return the
projector to the standby condition.
3 TEST Button
Press to display the TEST PATTERN menu from which
you can select a test pattern.
4 ADJUST Button
Press to display the ADJUST menu.
5 OPERATE Button
Press to display the OPERATE menu.Hold down the CTL
button and then press the OPERATE button to directly
display the Lens Control adjustment screen.
6 Backlight Switch
Turns the backlight on and off.
If no button operation is made within 30 seconds with the
Backlight ON, the Backlight will turn off to conserve
battery life. The light stays on in standby and power-on
when the remote control is used as a wired remote.
7 PIC CTL Button
Press to display the picture adjustment screen.
NOTE: Some function items will not be available depend-
ing on the type of video signal.
8 SOUND CTL Button
Press to display the VOLUME adjustment screen. You
can adjust the volume of the ISS-6020/ISS-6020G
Switcher. (when used with the ISS-6020 switcher on SW1
level or SW2 level mode)
9 PICTURE (PIC) MUTE Button
Press to mute the picture. Press again to display the
picture.
0 SOUND MUTE Button
Press to mute the sound. Press again to return the sound.
(when used with the ISS-6020 switcher on SW1 level or
SW2 level mode)
A DISPLAY Button
Press to turn on or off the on-screen display. Pressing with
CTL eliminates the on-screen display; pressing with CTL
will restore display.
NOTE: Even if the on-screen display may be turned off
with pressing CTL and DISPLAY, any adjustment will
still change the projector’ s memory settings. This mode
is available even when an input is switched to another or
the power is turned off using the POWER OFF button on
the remote control.
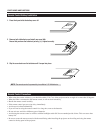
You can use your remote control with the cable or wirelessly
to operate your MultiSync Hivid 6500 Projector.
If you want to use your remote control with the cable, connect
one end of the cable to the jack on the remote control and the
other end to the REMOTE 2 IN jack of the projector.
1 ABC 2 DEF 3 GHIOFFON
4 JKL 5 MNO 6 PQRTEST
7 STU 8 VWX 9 YZ/
ADJUST
OPERATE
10 ,.
SOUND CTL
PIC CTL
INFO
INPUT LIST
SOUND MUTE
PIC MUTE
POSITION
KELVINHELP
DISPLAY
RGB
ADDRESS
SIG LEVEL
GAMMA
PIXEL CLK
PIXEL PHASE
STORE
DELETE
CTL ENTER END
NORMAL
ZOOM/PAN
POWER INPUT
CURSOR
ON
OFF
CAPTION
2
H
I
J
L
N
K
M
O
P
Q
S
T
U
V
R
1
7
9
A
C
D
F
G
3
5
4
6
8
0
B
E