3. From the Service type list, select POP3 Mail or IMAP4 Mail. (POP3 is the most common
mail protocol for ISPs.
4. Enter a unique name for the Service name and select OK.
5. Follow the steps in the Setup wizard to setup the Service Definition, General Preferences,
and Inbox Preferences.
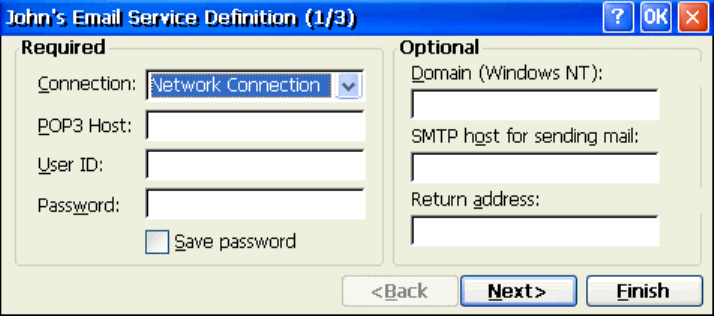
Set Service Definitions - Setup Wizard Screen 1
The Mail Service Setup wizard appears after you add a service. If you are adjusting the
settings of an existing service, select Services > Options, select the service you are using,
and then Properties. In the Service Definition dialog box, complete the following entries as
needed.
Connection
If you are receiving e-mail through a network (Ethernet) connection, select Network
Connection. If you want Inbox to use your current (i.e. dial-up) connection, select
(none). If you receive your e-mail through a dial-up connection and have not created one
yet, select Create new connection, double-tap or double-click the Make New
Connection icon, and follow the instructions in the wizard. When finished, select Inbox in
the Taskbar and continue setting up Inbox.
Pop3 Host
(POP3 only): Enter the name of the mail server you use to receive and send messages.
Server
(IMAP4 only): Enter the name of the mail server you use to receive and send messages.
User ID
Enter the user name or mailbox ID assigned to you.
Password
Enter the password you use to access this mail account. If you do not want to be
prompted to enter the password each time you connect, select Save password.
Domain (Windows NT)
Enter your Windows NT domain name. This name is required only when connecting to
networks, such as a corporate network, that use Windows NT domain security. This is not
required for most ISP accounts. If you have trouble connecting, try clearing this box.
