51
Recording (Transferring Data)—Continued
USB Connection
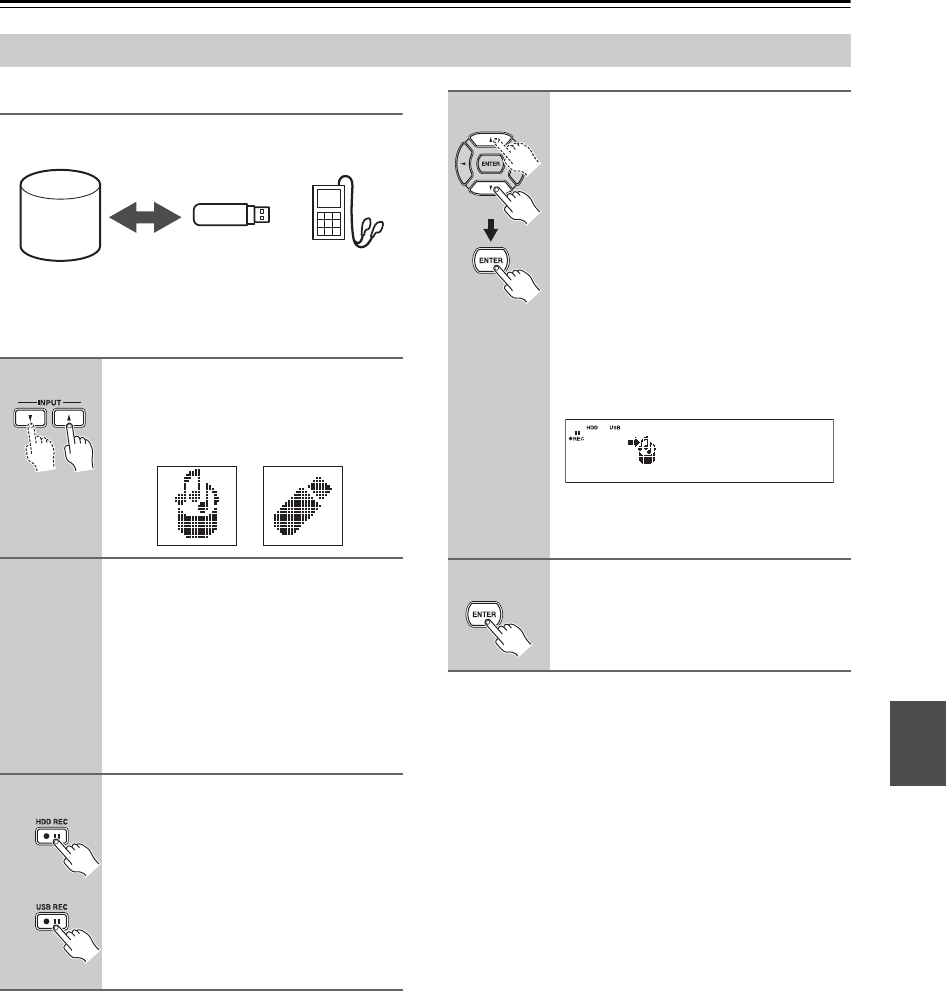
The CD/HDD receiver can transfer the data between its
HDD (hard disk drive) and your USB device (digital
audio player or USB storage device).
■ Transferring favorite tracks at a time
If you want to record tracks from multiple albums or art-
ists, first add these tracks to the playlist in advance, and
then select the playlist to record the tracks at a time when
recording. See “Creating and Playing the Playlist” on
page 57.
1 Add tracks to the playlist.
2 Select a track in the playlist, and press [ENTER].
3 Press [ REC] on the CD/HDD receiver, and
select “USB ALL COPY”.
Transferring Data
1
Switch the input source to the
transfer source.
Press the INPUT [ ]/[ ] buttons to
select HDD or USB.
2
Select a track or a track list of
album, artist, etc. you want to
transfer.
For selecting tracks, see step 2 in “Play-
ing Selected Tracks” on the pages shown
below:
When selecting tracks in the HDD, see
page 55. When selecting tracks in the
USB, see page 43.
3
Press the [ ] button according
to the transfer destination.
When transferring to the HDD, press the
HDD REC [ ] button. When transfer-
ring to a USB device, press the USB
REC [ ] button.
You can also use the REC button and
MULTI JOG dial on the CD/HDD
receiver.
HDD USB
storage
Digital audio
player
or
4
Use the Up and Down [ ]/[ ] but-
tons to select either of the follow-
ing, and then press [ENTER].
When transferring all tracks in the folder
onto the HDD, select “HDD ALL
COPY”. When transferring one track
onto the HDD, select “HDD COPY”.
When transferring all tracks in the folder
into a USB device, select “USB ALL
COPY”. When transferring one track
into a USB device, select “USB COPY”.
You can also use the MULTI JOG dial on
the CD/HDD receiver to select these
items.
The confirmation message appears. (The
above is an example when “HDD ALL
COPY” is selected.)
5
Press [ENTER].
Data transfer starts.
Ready?
HDD 73.4 GB free
