About Your Projector
ENGLISH -
19
Preparation
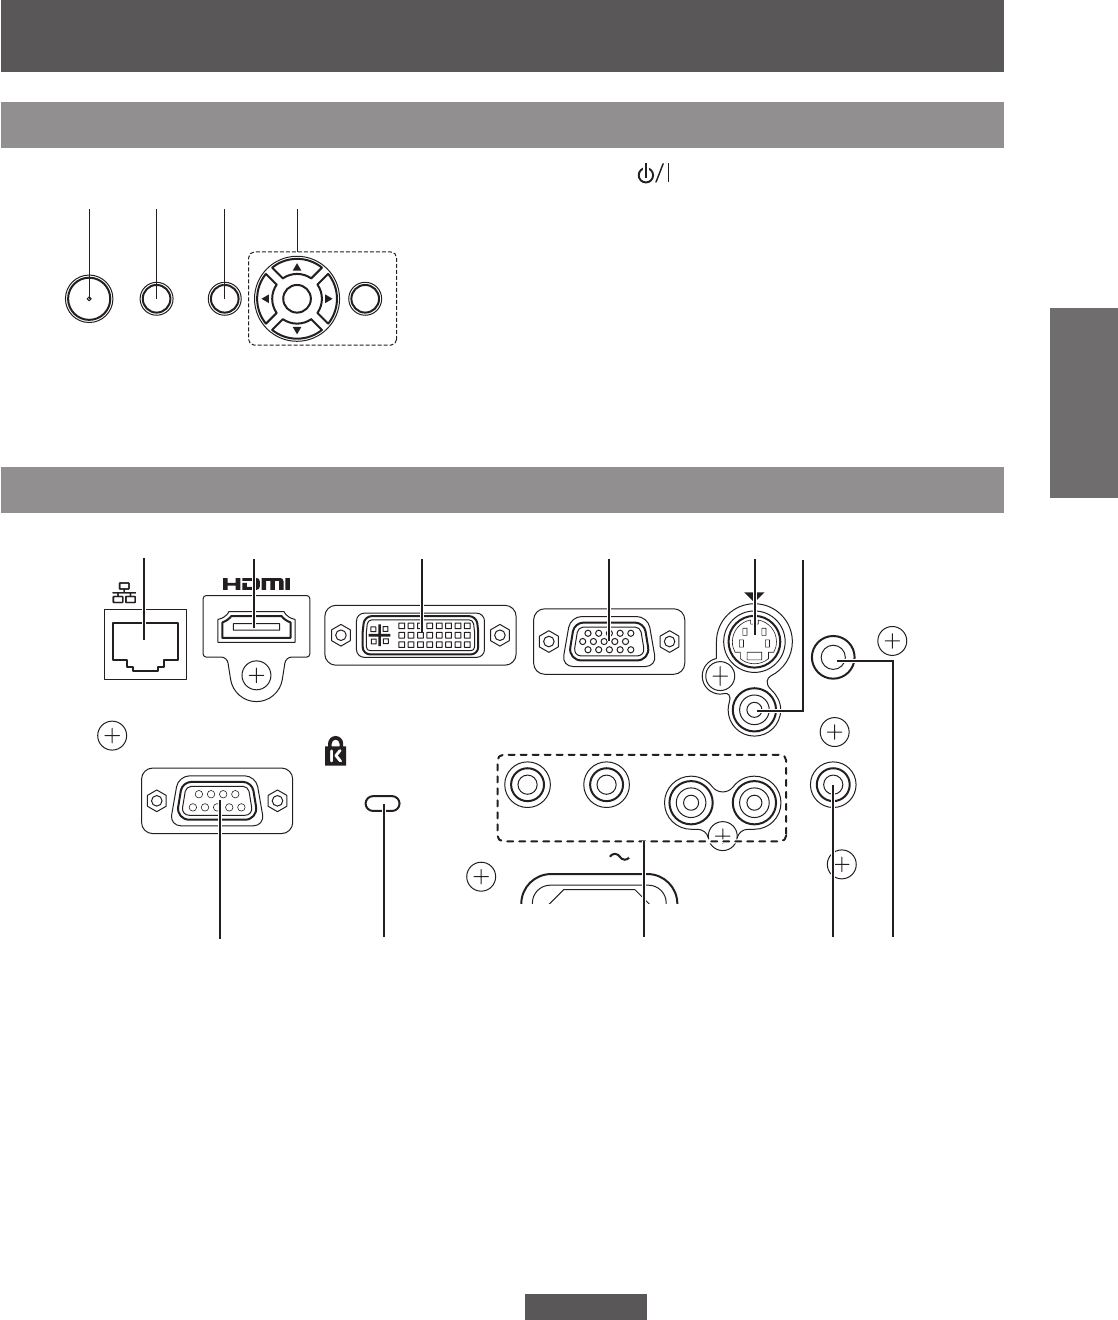
Rear terminals
CONTROL PANEL
ロモワ
リワ
ュヷリノリチリワ
ヤヰヮヱヶヵユンチリワ
ヷリュユヰ
リワ
モヶュリヰチリワチピ
モヶュリヰチリワ
ヴユンリモロチリワ
ヒビ
ヮモリワ
ヱヰヸユン
ヰワヰョョ
モヤチリワ
ンロ
ヴノヷリュユヰチリワ
ヷモンリモャロユ
モヶュリヰチヰヶヵ
(1)
(2) (3) (4) (5)(6)
(7)(9)(8)
(10) (11)
(1) LAN
Connects to a LAN cable for network connection.
(2) HDMI IN
Connects to HDMI input signals.
(3) DVI-I IN
Connects to DVI-D, DVI-A (RGB or YP
B
P
R
) input
signals.
(4) COMPUTER IN
Connects to RGB or YP
B
P
R
input signals.
(5) S-VIDEO IN
Connects to S-VIDEO input signals.
(6) VIDEO IN
Connects to VIDEO input signals.
(7) SERIAL IN
Connects to a computer via an RS-232C cable.
(8) Security slot
Attach the commercial shackle lock, manufactured
by Kensington, to protect your projector.
Compatible with the Kensington MicroSaver
Security System.
(9) AUDIO IN 1-3
Connects to the audio input signals.
AUDIO IN 3 has right and left (L and R) terminals.
(10) VARIABLE AUDIO OUT
Outputs the audio signals input to the projector.
(11) Remote control signal receiver(rear)
Attention
When a LAN cable is directly connected to the projector,
z
the network connection must be made indoors.
ユワヵユン
ンユヵヶンワヮユワヶ
リワヱヶヵチヴユロユヤヵ
(1)
(3)(4)
(2)
(1) Power < > button
Turns power on/off when the main power switch
on the rear of the projector is [ON].
(2) <INPUT SELECT> button
Selects the input signal. (
Æ
page 32)
(3) <MENU> button
Displays the MENU screen. (
Æ
page 35)
(4) ▲▼◄► buttons, <RETURN> button, <ENTER>
button
Navigate the MENU screen.


