PROJECTOR SETUP menu
ENGLISH -
63
Settings
TEST PATTERN
The test patterns do not reect position, size and
other adjustments. Be sure to display the input signal
before making any test pattern settings.
Press ▲▼ to select [TEST PATTERN].1 )
Press the <ENTER> button.2 )
[TEST PATTERN] will be displayed.
z
Press ◄► to switch test patterns.3 )
You can return to [PROJECTOR SETUP] by
z
pressing the <MENU> or <RETURN> button.
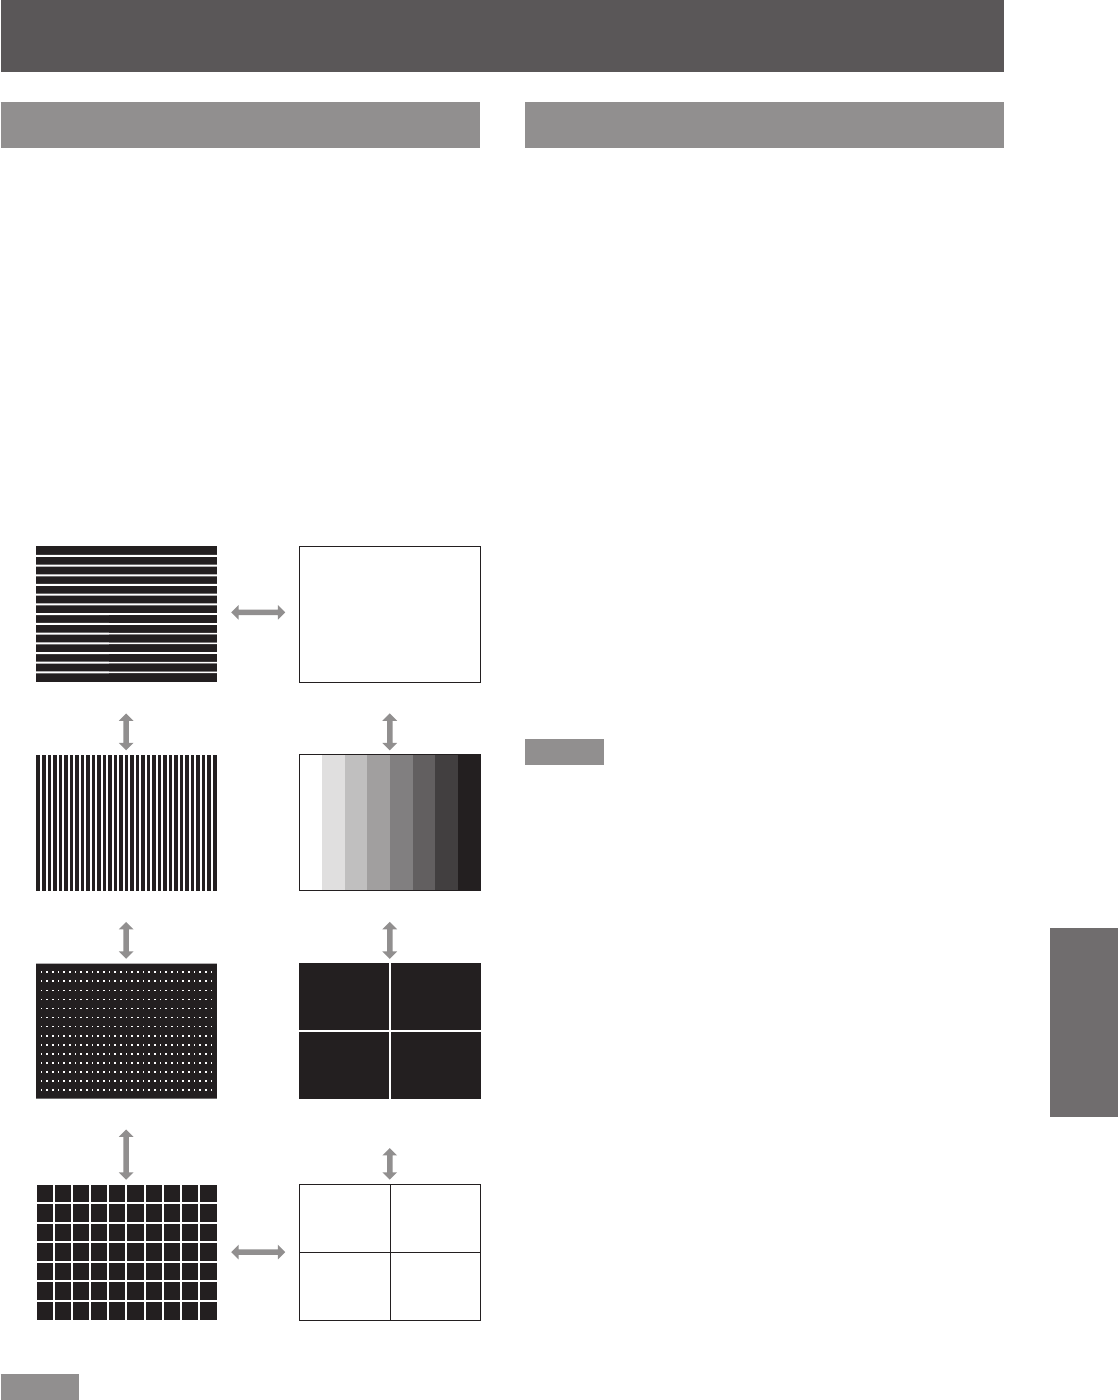
Display sequence of internal test
J
patterns
Each press of the ◄► buttons switches the test
patterns as shown below.
Horizontal lines
Vertical lines
Dots
Cross hatch
All white
Color bars
White cross on
black background
Black cross on
white background
Note
The default screen is all white. If you assign this to
z
<FUNC1> to <FUNC3>, Cross hatch becomes the
default.
INITIALIZE ALL
Use the steps below to return all adjusted “MENU”
items to their factory defaults.
When you perform this function, the projector enters
standby mode to initialize.
Press ▲▼ to select [INITIALIZE ALL].1 )
Press the <ENTER> button.2 )
[INITIALIZE ALL] appears.
z
A password must be entered, when
z
[PASSWORD] in the [SECURITY] menu is set
to [ON]. (
Æ
page 64)
Press ◄► to select [OK].3 )
Press the <ENTER> button.4 )
The [NOW INITIALIZING…] screen appears,
z
and is followed by [POWER OFF].
Follow the screen instructions to turn 5 )
off the power (
Æ
page 30).
All other key operations are unavailable at this
z
time.
The [LANGUAGE] and [INITIAL SETTING]
z
screens appear the next time the projector is
started. (
Æ
page 16)
Note
Projector runtime, lamp runtime and [NETWORK]
z
settings are not initialized.
After performing [INITIALIZE ALL], the password is
z
returned to its factory default and [PASSWORD] is
set to [OFF].


