


Chapter 4 Settings — [DISPLAY OPTION] menu
ENGLISH - 69
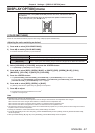
[AUTO SIGNAL]
Set automatic execution of auto setup.
The screen display position or signal level can be adjusted automatically without pressing the <AUTO SETUP> button on the remote control
on each occasion if you input unregistered signals frequently at meetings, etc.
1) Press as to select [AUTO SIGNAL].
2) Press qw to switch [AUTO SIGNAL].
f The items will switch each time you press the button.
[OFF] Sets input auto setup to off.
[ON]
Executes auto setup automatically when images are changed to unregistered signals during
projection.
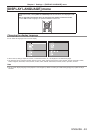
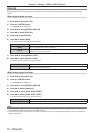
[AUTO SETUP]
Set this when adjusting a special signal or horizontally long (such as 16:9) signal.
1) Press as to select [AUTO SETUP].
2) Press the <ENTER> button.
f The [AUTO SETUP] screen is displayed.
3) Press qw to switch [MODE].
f The items will switch each time you press the button.
[DEFAULT]
Select when receiving a signal whose image aspect is 4:3 or 5:4. (Supported resolutions are
640 x 400, 640 x 480, 800 x 600, 832 x 624, 960 x 720, 1 024 x 768, 1 152 x 864, 1 152 x 870,
1 280 x 960, 1 280 x 1 024, 1 600 x 1 200, and 1 400 x 1 050)
[WIDE]
Select when receiving a signal whose image aspect is wide-screen. (Supported resolutions are
720 x 400, 848 x 480, 1 280 x 720, 1 024 x 600, 1 120 x 750, 1 440 x 900, and 1 680 x 1 050)
[USER] Select when receiving a signal with a special horizontal resolution (number of display dots).
f When [DEFAULT] or [WIDE] is selected, proceed to Step 6).
f When [USER] is selected, proceed to Step 4).
4) Press as to select [DISPLAY DOTS], and press qw to adjust [DISPLAY DOTS] to the horizontal
resolution of the signal source.
5) Press as to select [MODE].
6) Press the <ENTER> button.
f Automatic adjustment is executed. [PROGRESS] is displayed while automatically adjusting. When complete, the system returns to the
[AUTO SETUP] screen.
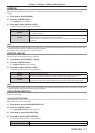
[COMPUTER IN]
Set to match the signal to input to the <COMPUTER IN> terminal.
1) Press as to select [COMPUTER IN].
2) Press the <ENTER> button.
f The [COMPUTER IN] screen is displayed.
3) Press qw to switch [SYNC SLICE LEVEL].
f The items will switch each time you press the button.
[LOW] Sets the slice level to [LOW].
[HIGH] Sets the slice level to [HIGH].