124
If another projector exists on the same network as the one
for the PC onto which Wireless Manager 2.0 has been
installed
ee
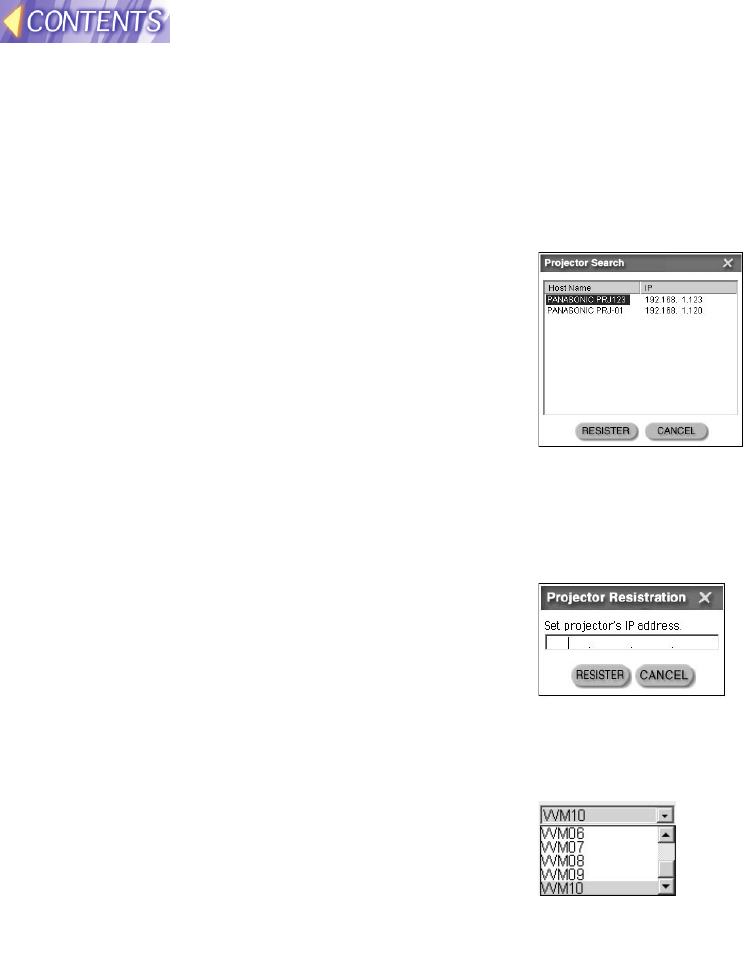
Click the "Search" button (B).
A "Searching Projectors" screen is displayed. To cancel the search, click the
"Cancel" button.
When the search is completed, a list of projectors connected to the network will
be displayed.
rr
Choose the desired projector to which
the image data will be transmitted and
click the "Register" button.
Note:
• If no projector is found on the network, a "No projector
is found" message is displayed. Check the network
setting of the PC in use and the projector setting.
If no projector does not exist on the
same network as that for the PC onto which Wireless
Manager 2.0 has been installed, or when a projector is to be
registered manually
ee
Click the "Add" button (C).
rr
From the keyboard, type the IP address
of the projector and click the "Register"
button.
The projector will be registered in the list of projectors
to which the image data is to be transmitted.
If the specified projector is not found on the network,
a "The projector was not detected" message will be
displayed.
If you want to cancel the registration, click the
"Cancel" button.
tt
Choose the SD folder to which the
image data is to be transmitted.
Image data can be transmitted onto the SD card
inserted in the projector.
Ten folders are provided on the SD card to receive
the transmitted image data.
Click the pull-down key of the "Folders in SD" and
choose a folder to which images are to be
transmitted from folders displayed.
yy
Click and choose the projector to which image data is to be
transmitted.
Image data cannot be transmitted unless a projector is selected.
uu
Click the "OK" button.
This will establish the setting.
To abort the setting, click the "Cancel" button.


