


Installation & Setup 2-9
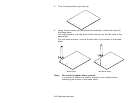
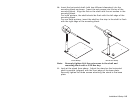
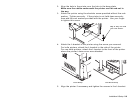
2. Align the hole in the printer over the hole in the base plate.
Make sure the cables underneath the printer are flat and not in
the way.
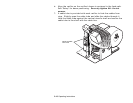
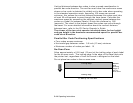
3. Attach the printer using the shoulder screw provided without the cork
washer. Tighten securely. If the printer is not held down securely,
then add the cork washer provided with the printer. Use your finger
to tighten this screw.
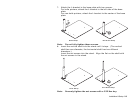
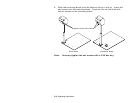
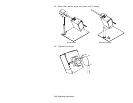
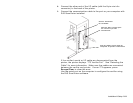
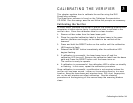
4. Attach the L-bracket to the printer using the screw you removed.
For knife printers, attach the L-bracket to the side of the printer.
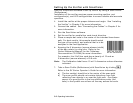
For non-knife printers, attach the L-bracket to the front of the printer
where the printer’s base cover was attached.
5. Align the printer if necessary and tighten the screws in the L-bracket.
Knife Setup
Non-Knife Setup
May or may not need
this cork washer.