


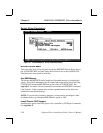
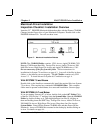
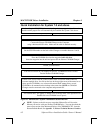
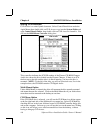


Figure 18 - MACINTOSH - System 7.0 and above QUICK INSTALL
NOTE: Updates to the drivers may mean that different files will be on the
diskette you receive with your Pioneer CD-ROM Drive. You can download the
most recent version of the Macintosh Drivers, file CDROMXX.CPT, from the
Pioneer Bulletin Board. See Appendix F, Pioneer Technical Resource Numbers.
Quick Installation for System 7.0 and above
MACINTOSH Driver Installation Chapter 4
4-2 Software Driver Installation Guide / Owner’s Manual
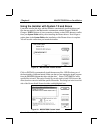
After launching the PIONEER diskette and making a back up copy, double click on the
Installer and the proper files will automatically be installed into System 7.0 & above.
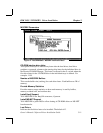
Power-down the Macintosh.
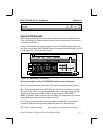
Connect the Pioneer CD-ROM Changer to the Computer
using a Macintosh SCSI cable. Make sure the cable is attached securely.
Set the SCSI ID number on the back of the Changer to a number between 1 and 6.
Restart your Macintosh.
You will see an icon on your desktop for the first CD-ROM disc that is loaded
into the Pioneer CD-ROM Changer.
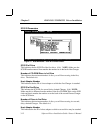
Place the CD-ROM discs into the magazine label side down.
Insert the magazine into the unit and power-ON the Pioneer CD-ROM Changer.
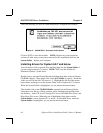
Launch CLD Access from the Control Panels folder and use the ROM Controller
to mount multiple discs. Or click on the icon in the top right corner of the menu bar to
select specific CD-ROMs, or to select multi-mount. Multi-mount allows several
CD-ROMs to be mounted on the desktop at the same time. NOTE: A CD-ROM
Changer must be connected to the computer and powered-ON.
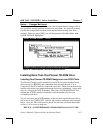
The mounted discs will appear as desktop icons as though there were separate drives.
Double click on a CD-ROM icon to open it.
✓