E – 38
Color System
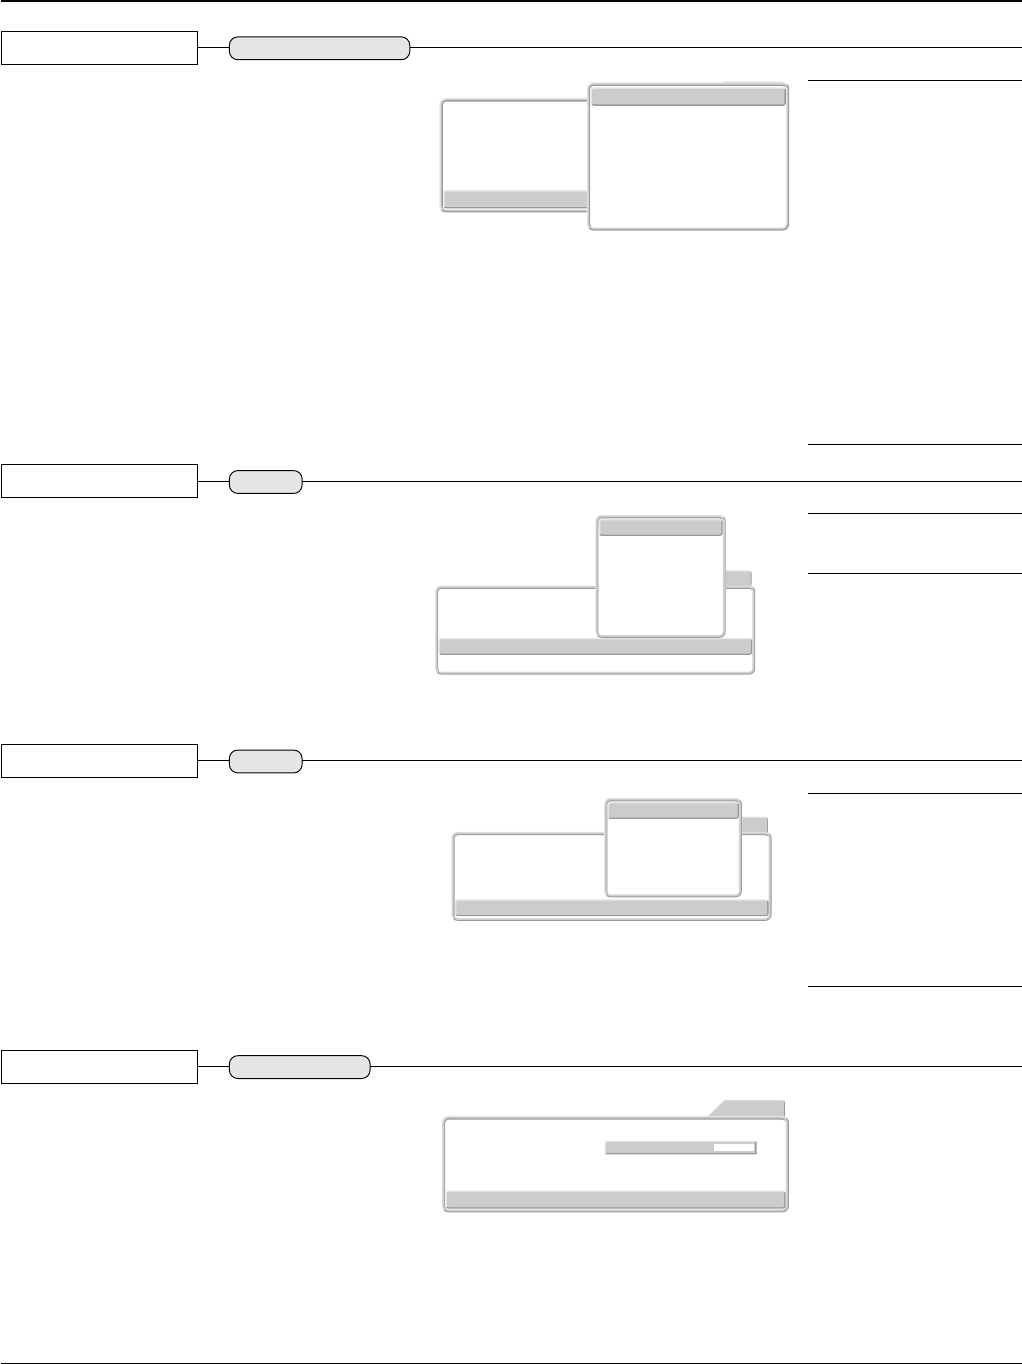
Video Signal Color System Settings
These settings are of the color system of the com-
posite video signal.
This function is normally set to Auto. If the color sys-
tem cannot be identified on Auto, set it manually.
Press the (̆̄) cursor button and align the cursor with
[Color System], then press the SET button.
The color system selection display will appear.
Press the cursor (̆̄) button to match the composite
video signal system of the input equipment, then press
the SET button to finalize.
Picture1
Video Filter
Zoom Filter
ProScan Mode
Gamma
Color System Auto
Picture2 Setup Info.
VIDEO
Option
Auto
NTSC
NTSC4.43
PAL
PALM
PALN
PAL60
SECAM
Note:
* The video signal created by add-
ing the color signal to the bright-
ness signal is termed the com-
posite video signal and differs de-
pending on the country.
The color system sets the method
of this color signal.
*PAL-M cannot be identified au-
tomatically and will need to be set
manually.
Note that when PAL-M and other
color systems are set manually,
the "No Signal" display will not
appear during absence of signal
input.
The background color under such
circumstances will be entirely
black.
Input Video Adjustments [Picture 2]
Format
Format Settings
Usually, [Auto] is specified.
Press the cursor (̆̄) buttons and align the cursor with
[Format], then press the SET button.
The format selection display will appear.
Press the cursor (̆̄) button to match the format of
the input signal, then press the SET button to finalize.
Picture1
Zoom Filter
Gamma
Format Auto
Color Space
Picture2 Setup Info.
YPbPr
Option
Auto
480P
576P
720P
1080i
Note: This is the format setting for
the digital broadcast specifications
of Japan.
Picture1
Zoom Filter
Gamma
Format
Color Space
Picture2 Setup Info.
YPbPr
Option
ITU-R.BT709
Auto
ITU-R.BT601
SMPTE240M
Auto
Color Space
Color Space Settings
This is set when projecting a YPbPr signal that ap-
pears as a reddish or greenish image.
Press the cursor (̆̄) buttons and align the cursor with
[Color space], then press the SET button.
The color space selection display will appear.
Press the cursor (̆̄) button to match the color space
of the normal image, then press the SET button to
finalize.
Note: When the YPbPr signal un-
dergoes conversion to the red,
green, and blue colors that express
the projector image, the correct
colors cannot be expressed unless
a system is used that will conform
to the color difference conversion
system of the input signal. Color
space is the function that selects
this.
Picture1
Zoom Filter 3
White Peak
- Pan -
Off On
Gamma CustomGraphicsFilmVideo
Picture2 Setup Info.
RGB
Option
White Peak
Setting of White Emphasis
This is used to emphasize and display the whites of
text or diagrams on personal computers.
Press the cursor (̆̄) buttons and align the cursor with
[White peak], then press the cursor (̇̈) buttons and
set.
Off: Switches off the white peak function
On: Emphasizes the highlights


