Chapter 3 SCT 320 Operation 17
2.8.3 Rotational Alignment
This general procedure assumes that you have already mounted the array detector to the exit port
of the spectrograph and that there is a light source at the entrance port. The basic actions are
listed below. Refer to Chapter 3 of this manual for detailed LightField and WinSpec instructions
for performing this function. For other application software, refer to that software’s manual or
help file.
1. Make sure the computer interface cables (for the spectrograph and detector) are
connected.
2. Verify that the power supplies are plugged into an AC source and are connected to the
spectrograph and detector.
3. Turn on the power to the spectrograph and the detector.
4. Start the application software.
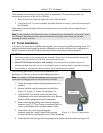
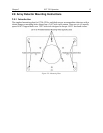
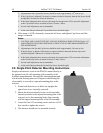
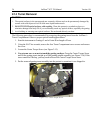
5. Loosen the rotation adjustment screws (see Figure 2-9) enough that you can rotate the
detector. The mounting plate holes are slotted to allow about 4° of rotational positioning.
6. If background subtraction is an available function, acquire a background to be applied
while data are acquired.
7. Turn on the light source and begin continuous data acquisition.
8. While viewing the data being acquired, rotate the detector until you obtain the sharpest
peaks or, if in imaging mode, the spectral lines are perpendicular in the image.
9. Tighten the mounting screws.
10. Confirm that the data still show sharp peaks or perpendicular spectral lines.


