Cleaning the Printer
43
4
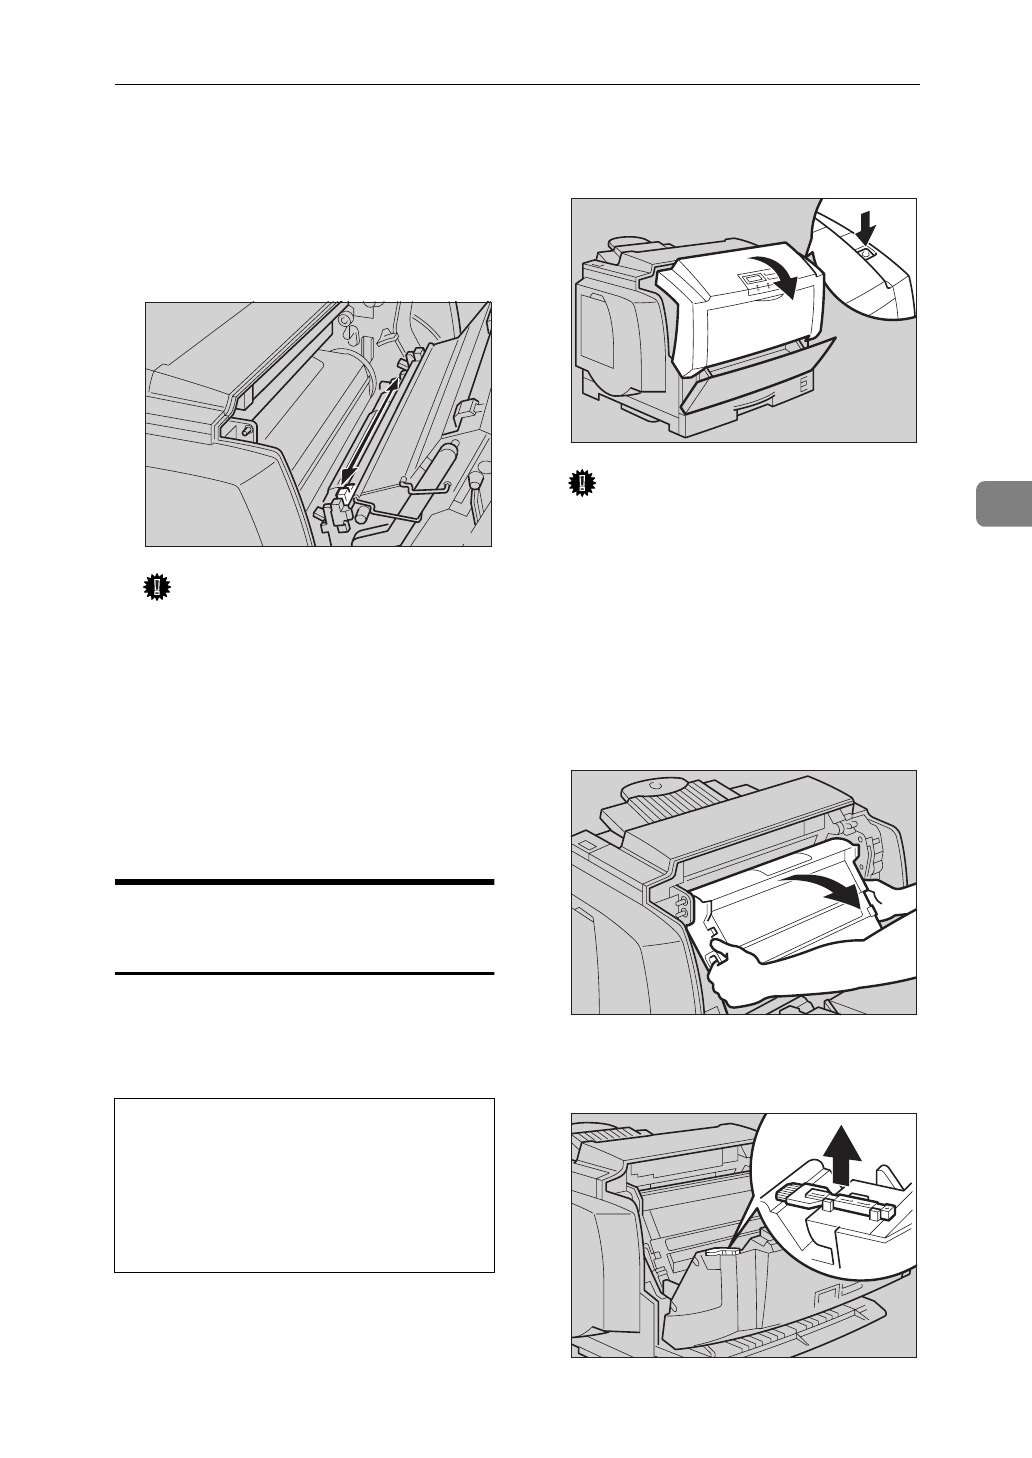
C Move the charger cleaner (light
blue part) left and right 2 or 3
times, and return it to the left
side. Set the arrow of the charger
cleaner to the arrow of the photo-
conductor unit.
Important
❒
If the charger cleaner is not on
the left side, an error message or
print problem might occur.
D Hold the inset grips (green part)
of the photoconductor unit, and
push the photoconductor unit to
its original position.
E Close the front cover.
Cleaning the Dust-proofing
glass
The dust-proofing glass may require
cleaning if black or white lines appear
on the print side of the document.
R
CAUTION:
A Open the front cover by pushing
the front cover release button.
Important
❒
Exposing the photoconductor
unit to light for too long can re-
duce its performance. Clean the
dust-proofing glass as quickly
as possible.
B Hold the inset grips (green part)
of the photoconductor unit, and
pull the top side of the photocon-
ductor unit forward.
C Remove the cleaning brush from
back of the front cover.
•
When accessing the inside of the
machine, do not touch any sec-
tions other than those specified
in this manual. If you do, it might
result in receiving a burn or inju-
ry.
TFWX260E
TFWX080E
TFWX250E
TFWX270E


