


10
Uninstalling the Software [Windows 98/Me]
1. Exit the RCC for PC-12 Software by right clicking on the Roland ColorChoice icon in the lower right
corner of your monitor and selecting Exit.
2. Click Start>Settings>Control Panel.
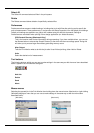
3. In the Control Panel, double-click the Add/Remove Programs icon.
4. Remove RCC for PC-12. Click OK when you are finished.
5. Go into the drive where the RCC for PC-12 Software is located. Its default name should be ‘RCC for PC-
12’. Delete this directory.
6. Click Start>Settings>Printers. Right click on the printer icon of the printer you installed, and then select
Delete from the menu.
7. Click Start>Settings>Control Panel. Double-click on the Add/Remove Programs icon. Uninstall the Hot
Folder 3 program.
8. Empty your Recycle Bin. You have successfully uninstalled the RCC for PC-12.
Uninstalling the Software [Windows 2000]
1. Exit the RCC for PC-12 Software by right clicking on the Roland ColorChoice icon in the lower right
corner of your monitor and selecting Exit.
2. Click Start>Settings>Control Panel.
3. In the Control Panel, double-click the Add/Remove Programs icon.
4. Remove RCC for PC-12. Click OK when you are finished.
5. Go into the drive where the RCC for PC-12 Software is located. Its default name should be ‘RCC for PC-
12’. Delete this directory.
6. Click Start>Settings>Printers. Right click on the printer icon of the printer you installed, and then select
Delete from the menu.
7. Click Start>Settings>Control Panel. Double-click on the Add/Remove Programs icon. Uninstall the Hot
Folder 3 program.
8. Empty your Recycle Bin. You have successfully uninstalled the RCC for PC-12.
Uninstalling the Software [PC-12 ColorCAMM DRIVER for Windows]
• In the PC-12 User's Manual, go to "Part 2 Installing the Driver" and refer to "2.2 Reinstalling and Deleting"
to remove the PC-12 ColorCAMM Driver for Windows from the computer.