


8
8. Click Next. The select Printer model window displays.
9. Select PPD’s. The file is located in the C:\Program Files\RCC for PC-12\PPD folder. Select the PPD
according to the model of your printer.
10. Click OK.
11. Click Next. The Printer Information Window displays.
12. Select No for your default printer.
13. Select No for Test page.
14. Click Next. The Setup Information window displays.
15. Click Install. The Printer Configuration window displays.
16. Select No.
17. Click Next.
18. Click Finish. The Restarting window displays.
19. Click OK to restart your computer.
Before using Roland ColorChoice
Before using Roland ColorChoice, you have to configure the AdobePS properly.
1. From the Start menu, select Settings then Printers.
2. Open the Printers folder.
3. Right click on the icon of your printer and select Properties from the pop- up menu.
4. Select the Details tab from the Printer Properties dialog.
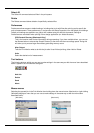
5. Click on the Spool Settings button. The Spool Settings dialog appears.
6. Select “Print directly to the printer” and “Disable bi-directional support for this printer” and click OK.
7. Click OK to close the Printer Properties dialog. You can now print from Adobe PS Printer driver to the
Roland ColorChoice.
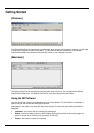
You will notice, each time that your computer is started, an icon for the Roland ColorChoice Software in the
lower right corner of your monitor. This indicates that your computer is ready to begin printing to the Roland
ColorChoice.
Windows 2000 Installation
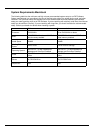
This section describes how to install and set up the program on a computer running Windows 2000. To install
and set up the program, you must log on as a user with administrator rights.
Important: Before you install and set up the RIP program, you must be sure to install the PC-12
ColorCAMM Driver for Windows.
Run Setup for the PC-12 ColorCAMM Driver for Windows.
For the connection between the computer and the machine, choose USB Port Connection.
1. Insert the PC-12 ColorCAMM Driver for Windows Installation CD-ROM into the computer's CD-ROM
drive, then follow the instructions in "Part 2 Installing the Driver" of the PC-12 User's Manual to install
and set up the driver.
2. Insert the Roland ColorChoice Installation CD into your CD ROM drive.
3. From the CD Setup window, select the language of the installer you would like.
4. Click Next. The Software to Install window displays.
5. Select the product you would like to use from Product drop-down box.
6. Click Next. The Welcome Window displays.